 Save
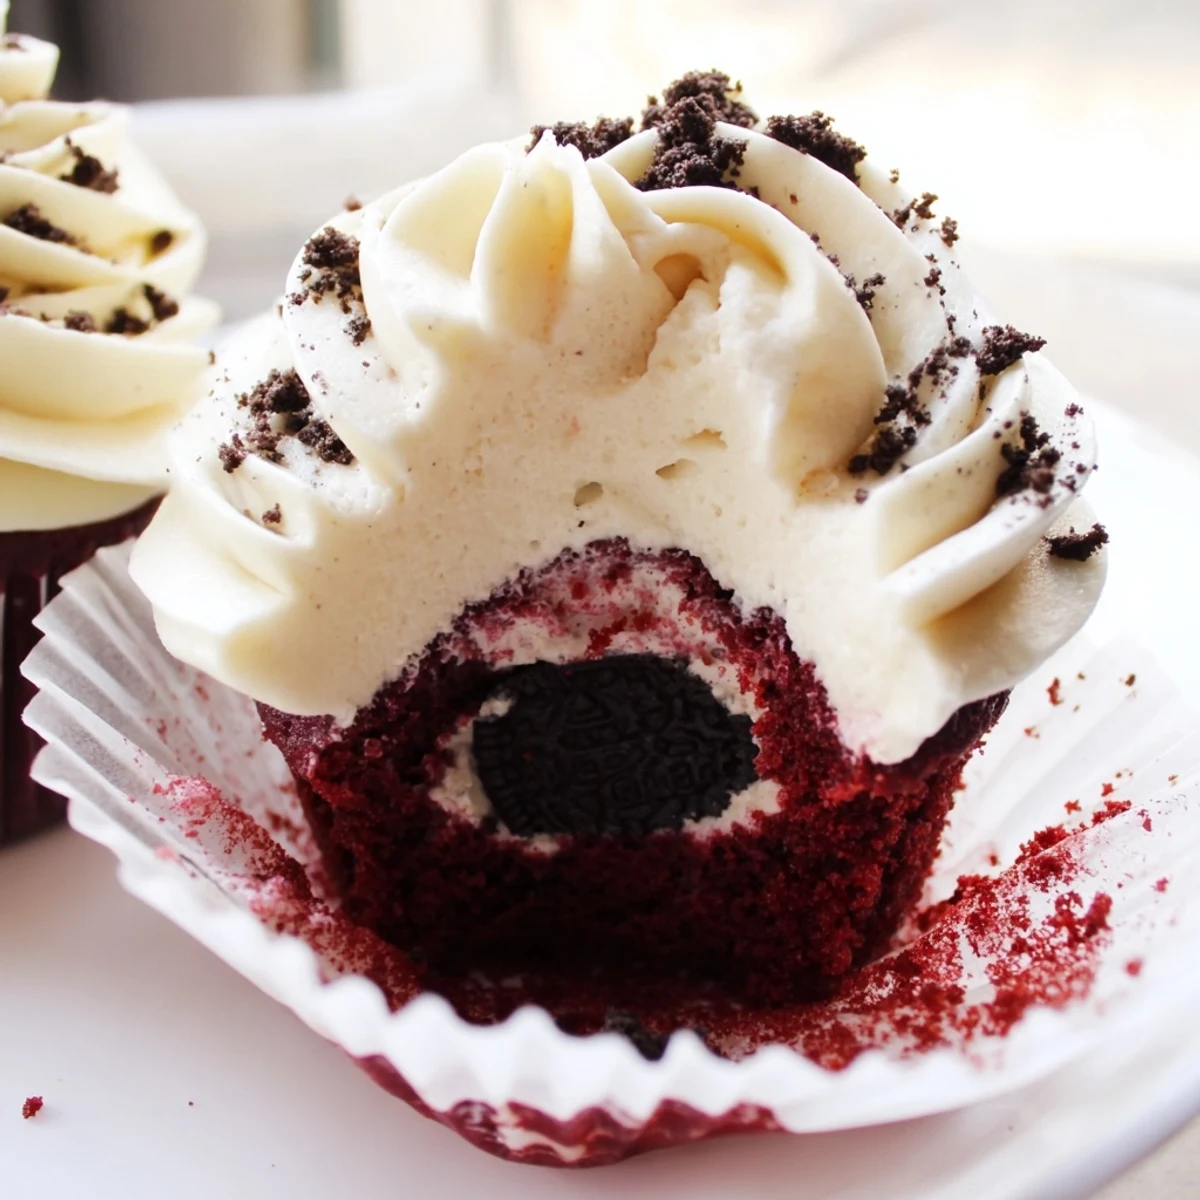
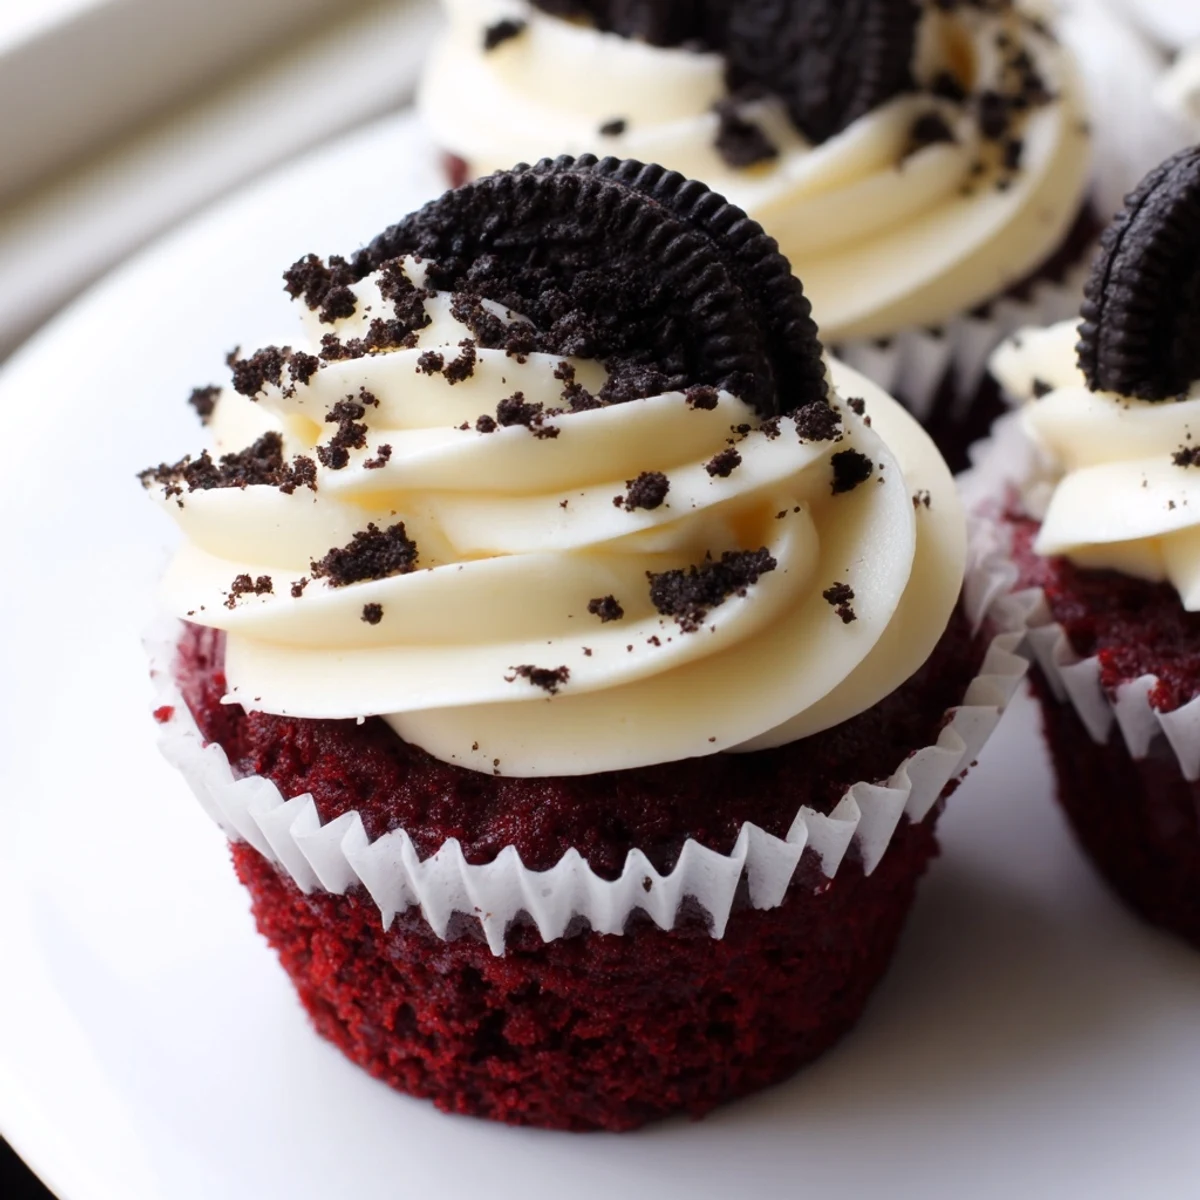
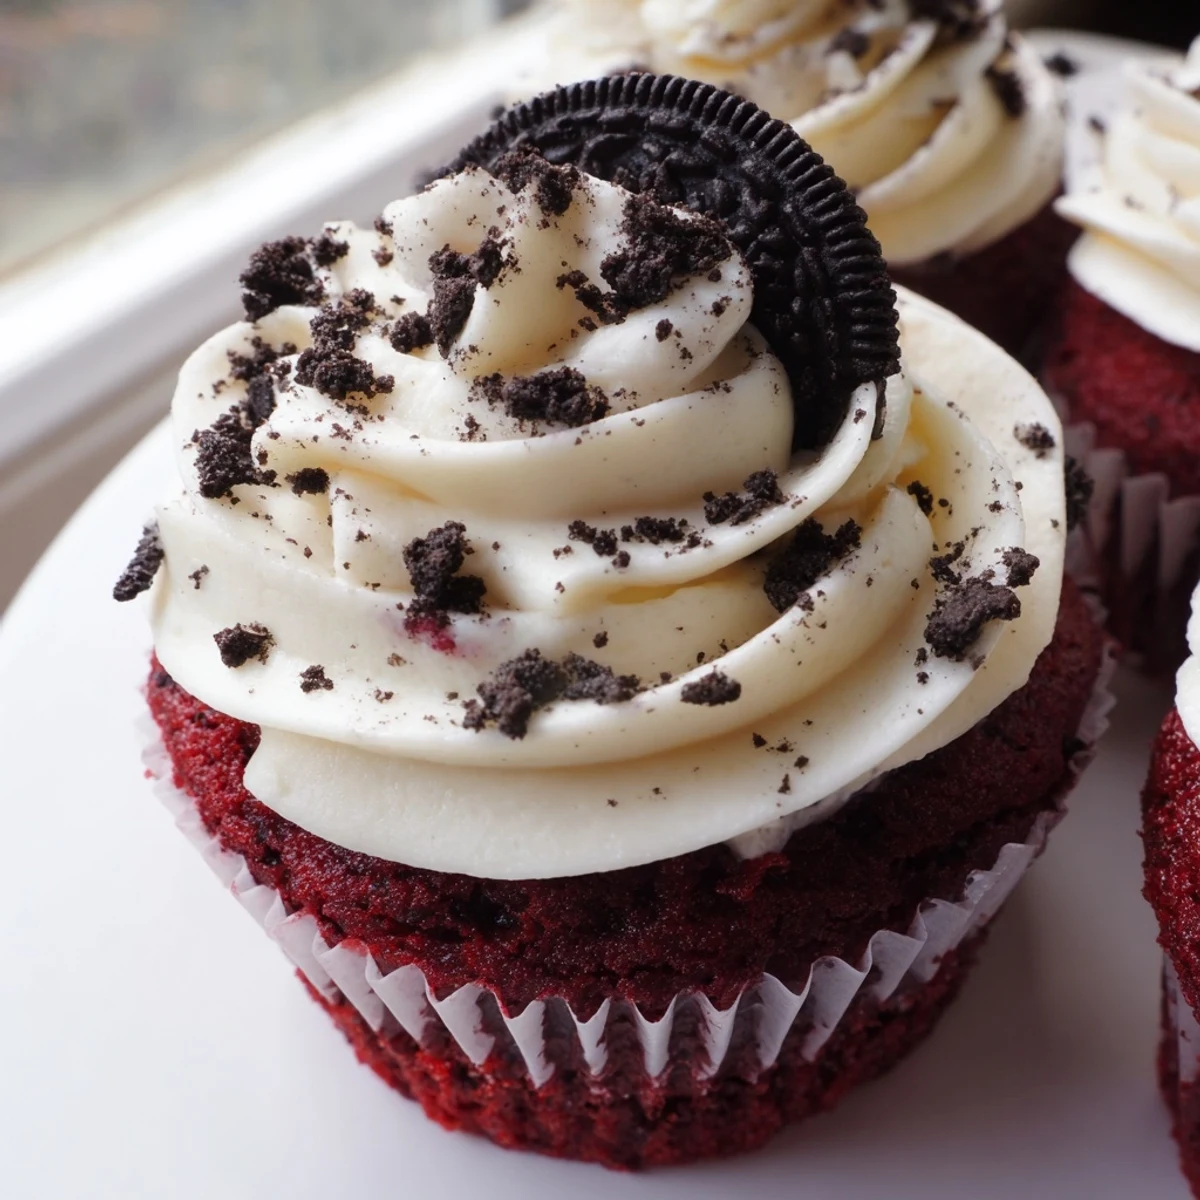
Save These indulgent cupcakes feature a whole Oreo cookie tucked into the bottom of each liner, covered with a rich red velvet batter flavored with cocoa powder and buttermilk. Once baked to fluffy perfection, they're crowned with a luscious cream cheese frosting loaded with crushed Oreo pieces. The contrast of the soft cake, the crunchy cookie base, and the creamy frosting makes every bite irresistible.
Ready in just 40 minutes, they yield 12 generous cupcakes that are as stunning to look at as they are delicious to eat. A pinch of espresso powder in the batter can deepen the chocolate flavor even further.
My sister walked into the kitchen while I was elbow deep in red batter and said, you are making a mess, and I said, yes, but it is going to be worth it. She stood there long enough to watch me drop a whole Oreo into a cupcake liner, and her face shifted from skepticism to pure curiosity. That is the thing about these cupcakes, they make people stop and pay attention.
I brought a full batch of these to a friend potluck last winter and they vanished before the main course was even served. Someone actually hid two in her purse, which I consider the highest compliment a baker can receive.
Ingredients
- All-purpose flour (1 cup, 125 g): The backbone of the cupcake, sifted for a lighter crumb.
- Unsweetened cocoa powder (2 tbsp, 15 g): Just enough to give red velvet its subtle chocolate depth without overpowering.
- Baking soda (1/2 tsp): Works with the acidity of buttermilk to give these a gentle lift.
- Salt (1/4 tsp): A small amount that makes every flavor sharper and more balanced.
- Unsalted butter, softened (1/2 cup, 115 g): Room temperature butter creams better and traps more air into the batter.
- Granulated sugar (1 cup, 200 g): Sweetness and structure in one, do not skimp on it.
- Large eggs, room temperature (2): Cold eggs can make the batter seize, so pull them out early.
- Buttermilk, room temperature (1/2 cup, 120 ml): The secret to that tender, velvety texture people always try to guess.
- Vanilla extract (1 tsp): Use the real stuff if you can, it makes a noticeable difference.
- Red food coloring (1 tbsp): Gel gives a deeper color, but liquid works fine too.
- Oreo cookies (12 whole, plus extra for garnish): One goes into each liner as a crunchy, creamy base.
- Cream cheese, softened (8 oz, 225 g): Full fat cream cheese makes the richest frosting.
- Unsalted butter for frosting (1/2 cup, 115 g): Blended with cream cheese for the smoothest spread.
- Powdered sugar, sifted (2 cups, 240 g): Sifting prevents those awful lumps in your frosting.
- Vanilla extract for frosting (1 tsp): Rounds out the tang of the cream cheese beautifully.
- Crushed Oreo cookies (4): Folded into the frosting for tiny pockets of crunch.
Instructions
- Get the oven ready:
- Preheat to 350°F (175°C) and line a 12-cup muffin tin with paper liners. This is also the moment to pull out any ingredients you forgot to bring to room temperature.
- Plant the surprise:
- Drop one whole Oreo cookie into the bottom of each liner, cream side up if you want to be deliberate about it. Press gently so it sits flat.
- Whisk the dry team:
- In a medium bowl, combine the flour, cocoa powder, baking soda, and salt with a whisk until evenly blended. Set it aside so it is ready when you need it.
- Cream butter and sugar:
- Beat the softened butter and sugar in a large bowl until the mixture looks pale and feels light when you dip a finger in. Add the eggs one at a time, beating well after each so everything stays smooth.
- Add the red magic:
- Pour in the buttermilk, vanilla extract, and red food coloring, then mix until the color is even and vibrant. Expect your spatula to look like a crime scene, that is normal.
- Bring it all together:
- Gradually add the dry ingredients to the wet mixture, stirring until just combined and no dry streaks remain. Stop mixing the moment everything looks uniform, overmixing makes cupcakes tough.
- Fill the liners:
- Spoon the batter evenly over each Oreo, filling liners about three quarters full. An ice cream scoop makes this neater and more consistent.
- Bake and cool:
- Bake for 18 to 20 minutes, checking with a toothpick inserted into the cake part, not the cookie. Let them cool completely in the tin before frosting, patience pays off here.
- Make the frosting:
- Beat the cream cheese and butter together until silky smooth, then add powdered sugar and vanilla and whip until fluffy. Gently fold in the crushed Oreos so you get streaks of cookie without losing the airy texture.
- Frost and finish:
- Pipe or spread the frosting onto the fully cooled cupcakes and top with extra Oreo crumbs or mini cookies if you are feeling festive. Step back and admire your work before they disappear.
 Save
Save The quietest my kitchen has ever been was right after I set a full tray of these on the counter. Everyone just stood there eating, no talking, just sounds of approval.
Storing Them So They Stay Perfect
These cupcakes hold up well in the fridge for up to three days if you keep them in an airtight container. The Oreo at the base actually softens slightly and almost melts into the cake, which some people prefer over the fresh crunch.
Making Them Your Own
A pinch of espresso powder in the batter deepens the chocolate note without making them taste like coffee. You could also swap regular Oreos for golden or chocolate ones, each version shifts the flavor in a fun direction.
A Few Last Things Before You Start
Having everything measured and at room temperature before you begin makes the whole process feel calm and controlled. These are the small habits that separate a stressful bake from an enjoyable one.
- Use gel food coloring if you want that deep, dramatic red without thinning the batter.
- A piping bag gives a polished look but a simple spatula swipe works beautifully too.
- Always check Oreo packaging for allergen updates if you are baking for someone with sensitivities.
 Save
Save Every time I make these, someone asks for the recipe, and that is really the best thing a home baker can hope for. Share them generously and often.
Questions & Answers
- → Can I make these cupcakes without food coloring?
-
Yes, you can omit the red food coloring entirely. The cupcakes will have a more brownish chocolate appearance but will taste just as delicious. If you prefer a natural alternative, beet powder can add a subtle reddish hue without artificial ingredients.
- → How should I store leftover cupcakes?
-
Store them in an airtight container in the refrigerator for up to 3 days. Because of the cream cheese frosting, they should not be left at room temperature for extended periods. Let them sit out for about 15 minutes before serving to soften the frosting.
- → Can I freeze these cupcakes?
-
Yes, you can freeze them either frosted or unfrosted. Wrap each cupcake individually in plastic wrap and place in a freezer-safe container. They will keep well for up to 2 months. Thaw overnight in the refrigerator before enjoying.
- → What can I substitute for buttermilk?
-
You can make a quick buttermilk substitute by adding 1 tablespoon of white vinegar or lemon juice to 1/2 cup of regular milk. Let it sit for 5 minutes until it slightly curdles, then use it as directed. Plain yogurt thinned with a little milk also works well.
- → Why did my cupcakes sink in the middle?
-
Sinking can occur if the oven door is opened too early during baking, if the batter is overmixed, or if the oven temperature fluctuates. Avoid opening the oven door before the 18-minute mark, mix the batter until just combined, and use an oven thermometer to ensure accurate heat.
- → Can I use a different cookie instead of Oreos?
-
Absolutely. Any similarly sized sandwich cookie will work placed at the bottom of the liner. Chocolate sandwich cookies, golden vanilla cookies, or even thin fudge-striped cookies can create delicious variations with different flavor profiles.
