 Save
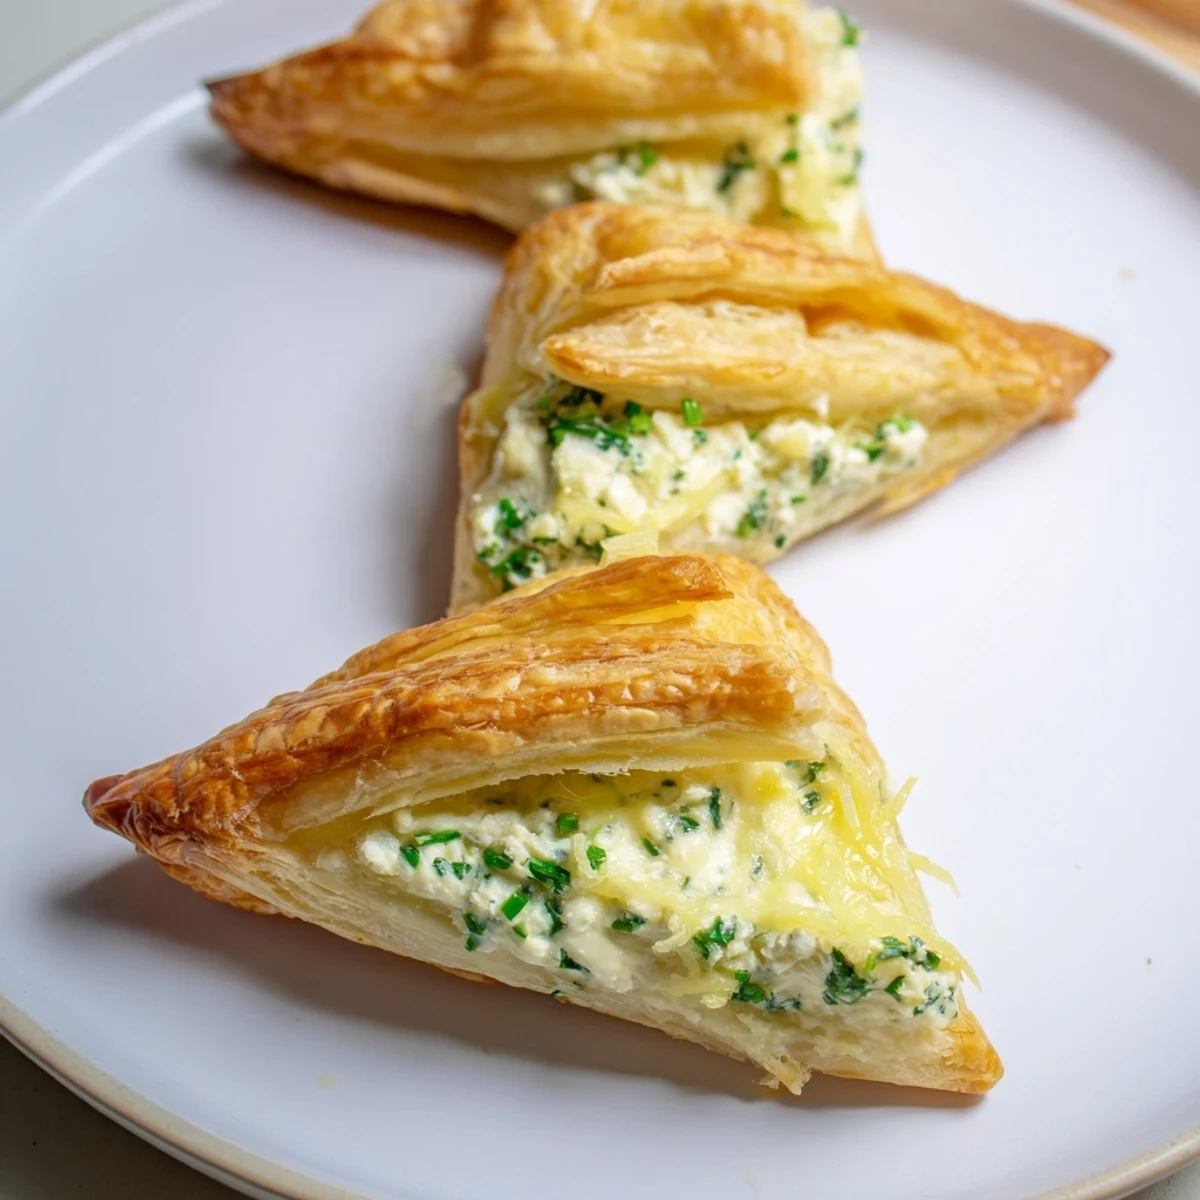
Save These light, golden puffs are crafted from flaky puff pastry filled with a creamy mixture of cream cheese, Gruyère, fresh herbs, and garlic. They bake up crisp and golden, offering a perfect balance of rich and fresh flavors. Ideal for serving warm, they make an elegant appetizer or party treat that pairs well with a crisp white wine. The quick preparation and baking time make them an easy yet sophisticated option for entertaining.
I remember the first time I made these savory pastry puffs for my neighbor's dinner party—I was nervous about impressing her, but when those golden, airy puffs came out of the oven, the whole kitchen filled with this incredible buttery aroma that made everyone pause at the door. She took one bite and her eyes lit up, and that moment reminded me that sometimes the simplest recipes with quality ingredients create the most memorable impressions.
I'll never forget bringing these to a potluck where someone had also made pastry appetizers—theirs were dense and heavy, mine were light and ethereal. One friend actually said, 'These taste like clouds,' and I realized that's exactly what puff pastry does when you treat it with respect and don't overwork it.
Ingredients
- 1 sheet (about 250 g) puff pastry, thawed if frozen: This is your foundation—buy a good quality one if you can, because it makes all the difference in how dramatically these puff up. If you thaw it in the fridge overnight, it's much easier to work with and won't tear.
- 1 egg, beaten (for egg wash): This gives them that beautiful golden color and a slight shine that says 'homemade with care.' Don't skip this step.
- 150 g cream cheese, softened: Let it sit on the counter for 15 minutes before mixing—soft cream cheese blends into a silky filling without lumps, and lumps are the enemy here.
- 50 g grated Gruyère or cheddar cheese: Gruyère has a nuttier, more sophisticated flavor that makes people wonder what your secret ingredient is. Cheddar works beautifully too if that's what you have.
- 2 tbsp fresh chives, finely chopped: The delicate onion flavor is essential—dried chives just won't give you that same brightness, so use fresh if at all possible.
- 1 tbsp fresh parsley, finely chopped: This adds color and freshness, like a tiny garden note in every bite.
- 1 clove garlic, minced: Just one clove keeps things elegant rather than overpowering—you want people to taste the cheese and herbs, not garlic soup.
- ½ tsp salt and ¼ tsp freshly ground black pepper: Season as you go, and always finish with fresh pepper right before serving if you can.
Instructions
- Get your oven and workspace ready:
- Preheat your oven to 200°C (400°F) and line a baking sheet with parchment paper. This takes just two minutes but makes cleanup so much easier, and more importantly, it prevents your beautiful puffs from sticking.
- Make the filling that holds all the magic:
- In a mixing bowl, combine your softened cream cheese with the grated cheese, and gently fold in the chives, parsley, and minced garlic. The mixture should be smooth and spreadable, almost cloud-like. Season with salt and pepper, and taste it—this is your moment to adjust flavors before everything is baked. I always sneak a tiny taste on a finger, and it helps me decide if it needs a little more salt or a pinch more garlic.
- Prepare your pastry with patience:
- Lay out your thawed puff pastry on a lightly floured surface. If it's cracking at the edges, that's normal—just gently push it back together. Using a ruler and a sharp knife, cut it into 24 equal squares, each about 5x5 cm. You want them roughly the same size so they bake evenly.
- Fill each square with intention:
- Place exactly 1 teaspoon of filling in the center of each pastry square—don't overfill, because the pastry needs room to puff and the filling needs to stay contained. Too little and they'll be all pastry and no reward, too much and it'll seep out the sides.
- Seal them like little presents:
- Fold each square into a triangle or rectangle, then press the edges firmly with your fingers to seal. If you want them to look extra special, use a fork to crimp around the edges—this both seals them and creates those little decorative lines that say 'I cared.'
- Give them their finishing touch:
- Arrange your sealed puffs on the prepared baking sheet, leaving a little space between each one because they'll puff. Brush the top of each puff with beaten egg using a pastry brush. This egg wash is what creates that gorgeous golden color and slight shine.
- Watch them transform in the oven:
- Bake for 20 to 25 minutes, until they're deeply golden and noticeably puffed. You'll know they're done when they look almost too good to eat. The kitchen will smell incredible—that's how you know the butter is doing its job.
- Let them rest briefly before serving:
- Allow them to cool for just a few minutes on the baking sheet before transferring to a serving plate. This lets the structure set slightly so they're easier to handle, and they'll still be warm enough to taste perfect.
 Save
Save I made these once for my sister's book club, and one of her friends (who's a professional chef, by the way) took one and went completely quiet. When she finally spoke, she just said, 'These are ridiculous,' and I knew she meant it as the highest compliment. That's when I understood that good food is about simple ingredients treated with respect, not complexity for its own sake.
Flavor Variations to Explore
The herbed cheese filling is just your starting point. I've experimented with adding chopped cooked ham or smoked salmon for a more substantial filling—just fold it in gently at the end so you don't lose the delicate texture. A tiny bit of Dijon mustard adds sophistication without being obvious. Even just switching from chives to tarragon completely changes the mood, taking it from casual to elegant. The beauty is that the puff pastry is neutral enough to play well with almost anything you want to layer in.
Serving and Storage Wisdom
These are honestly best served warm—when they're still holding that ethereal crispness and the filling is creamy and warm. I've found that if you need to make them ahead (and sometimes you do when you're hosting), you can completely prepare them through the egg wash stage, cover them loosely with plastic wrap, and refrigerate for a few hours. When you're ready, just add a few extra minutes to the baking time. They'll reheat beautifully in a 160°C oven for about 8 minutes if you have leftovers, though between you and me, they rarely last that long at a party.
- Serve them on a warm platter to keep the pastry from becoming soggy
- A crisp white wine like Sauvignon Blanc or a light sparkling wine pairs beautifully
- If you're serving a crowd, have them ready to go straight from cooling to plate—people always reach for them faster than you expect
The Science of Puff in Pastry
Understanding puff pastry transformed how I approach these. All those beautiful layers are created by butter and dough working together, and steam does the actual lifting. When you brush egg wash on top, you're sealing the surface just slightly, which allows steam to build pressure inside and creates that dramatic puff. I learned this after making dense puffs for years—the moment I understood I was essentially creating little steam chambers, everything changed. Now I respect the pastry more, work with it rather than against it, and the results show it.
Making Them Your Own
The recipe I'm giving you is reliable and delicious, but your kitchen is yours to experiment in. I've added everything from crispy bacon to sun-dried tomatoes, from sharp blue cheese to truffle oil. The filling is forgiving—you can taste and adjust as you go, which means you can make them perfectly suited to what you're in the mood for or what your guests love. That's the real kitchen magic: starting with a solid foundation and making it reflect your own taste.
- Always taste your filling before assembling the puffs and adjust seasoning boldly
- Fresh herbs truly matter here—dried herbs will make them taste generic instead of special
- Have fun with the shape—triangles look elegant, rectangles feel casual, and you could even press them into little nests if you wanted to get creative
 Save
Save These little puffs have become my go-to recipe for almost every gathering—they bridge the gap between 'I threw this together' and 'I spent hours in the kitchen,' and honestly, they taste like you care. That's really what matters.
Questions & Answers
- → What type of cheese is best for the filling?
-
A combination of cream cheese with grated Gruyère or cheddar offers a creamy texture with a flavorful, slightly sharp taste.
- → Can the puffs be prepared in advance?
-
Yes, you can assemble the puffs beforehand and store them in the refrigerator until ready to bake to maintain freshness and texture.
- → How do I ensure the pastry is flaky and golden?
-
Using thawed puff pastry and brushing the tops with beaten egg before baking helps achieve a crisp, golden finish.
- → Are there variations to the filling?
-
Adding chopped cooked ham or smoked salmon to the filling introduces savory depth without overpowering the herbs and cheese.
- → What is the recommended serving suggestion?
-
Serve the puffs warm for the best flavor and texture. They pair wonderfully with crisp white wines like Sauvignon Blanc.
