 Save
Save Transform ordinary pies into bakery-worthy showstoppers with this fishtail braid crust technique. The woven design creates an elegant, professional finish that works beautifully with fruit pies, custards, or savory fillings. While the braiding requires patience and practice, the step-by-step method makes it achievable for home bakers. The flaky, buttery pastry bakes to golden perfection, providing both visual appeal and delicious texture. Perfect for holidays, dinner parties, or whenever you want to make a memorable impression with homemade baking.
The moment I discovered fishtail braiding on a pie crust, I was attempting to rescue a slightly cracked dough that couldn't handle a traditional lattice. My grandmother watched from her kitchen chair, fascinated as I twisted four strips of pastry into something that looked more like hair than dessert. That pie ended up being the most photographed dish I'd ever made, and suddenly every holiday request involved "that fancy braided one." There's something deeply satisfying about turning simple dough into edible art.
I made this for my sister's wedding shower, surrounded by half a dozen friends who had never braided anything in their lives. We sat around the kitchen table with wine and flour-dusted aprons, laughing through failed attempts and celebrating each successful braid like we'd won an Olympic medal. By the third pie, everyone had developed their own braiding style, and we ended up with the most beautifully mismatched collection of pies I've ever seen.
Ingredients
- All-purpose flour (2 1/2 cups): The backbone of your crust structure. I've learned through many failed experiments that measuring by weight gives you the most consistent, foolproof dough.
- Cold unsalted butter (1 cup): Keep it straight from the fridge, cubes at the ready. Those cold butter flakes are what create the flaky layers that separate good pie crust from great pie crust.
- Salt (1 tsp): Don't skip this, even for sweet pies. It's the secret ingredient that makes all the other flavors pop.
- Sugar (1 tbsp): Just enough to help your crust brown beautifully and add a subtle sweetness that complements both fruit and savory fillings.
- Ice water (6-8 tbsp): The amount varies depending on humidity and flour brand. Add it gradually and trust your hands more than the exact measurement.
- Egg wash: One beaten egg with a splash of milk creates that gorgeous golden sheen that makes people think you're a professional baker.
Instructions
- Prepare your base dough:
- Whisk flour, salt, and sugar in a large bowl. Cut in cold butter until you see pea-sized chunks still visible, then add ice water gradually. The dough should hold together when squeezed but still look shaggy. Divide into two discs, wrap tightly, and refrigerate for at least one hour.
- Roll and prep your pie shell:
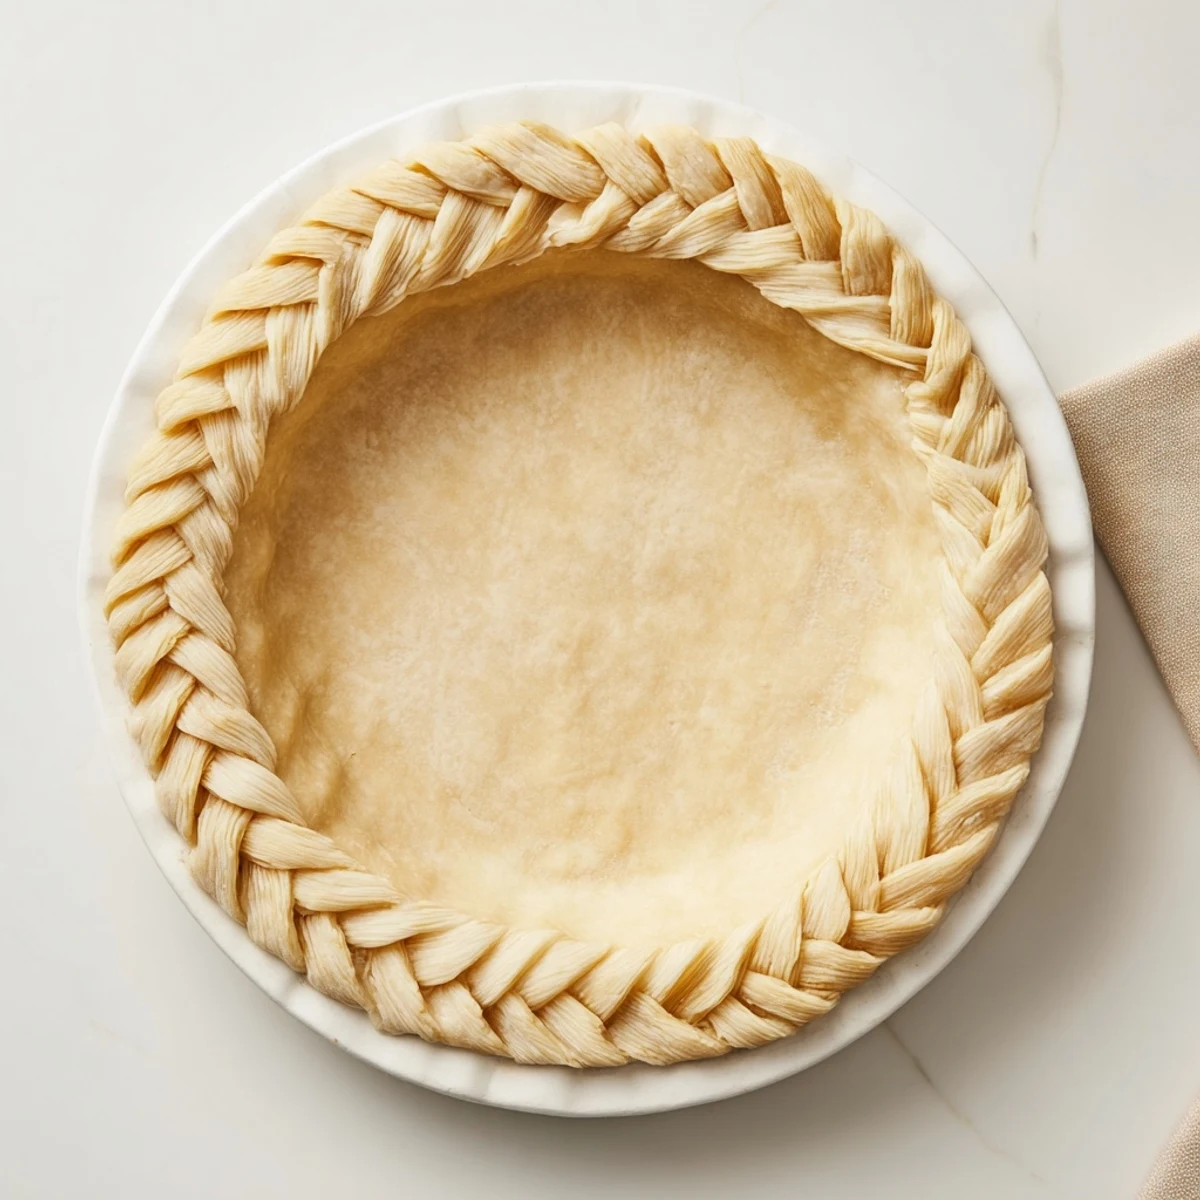
- Roll one disc on a lightly floured surface, rotating frequently to prevent sticking. Press gently into your 9-inch pie plate, trim the edges even with the rim, and return to the fridge while you work on the braids.
- Create your braid strips:
- Roll the second disc to about 1/4 inch thickness and cut twelve long, even strips roughly 1/2 inch wide. I use a pastry wheel for a professional-looking edge, but a sharp knife works perfectly fine too.
- Master the fishtail braid:
- Group strips into sets of four, pinching the tops together. Label them mentally 1 through 4 from left to right. Take strip 1, cross it over 2, under 3, and over 4. Repeat with the new left-most strip each time, keeping your tension gentle but consistent.
- Attach and seal:
- Carefully transfer each braid to the chilled pie edge, pressing gently to help it adhere. If your dough feels dry, lightly brush the crust edge with water before applying. Trim any excess and chill the whole pie for 15 minutes before baking.
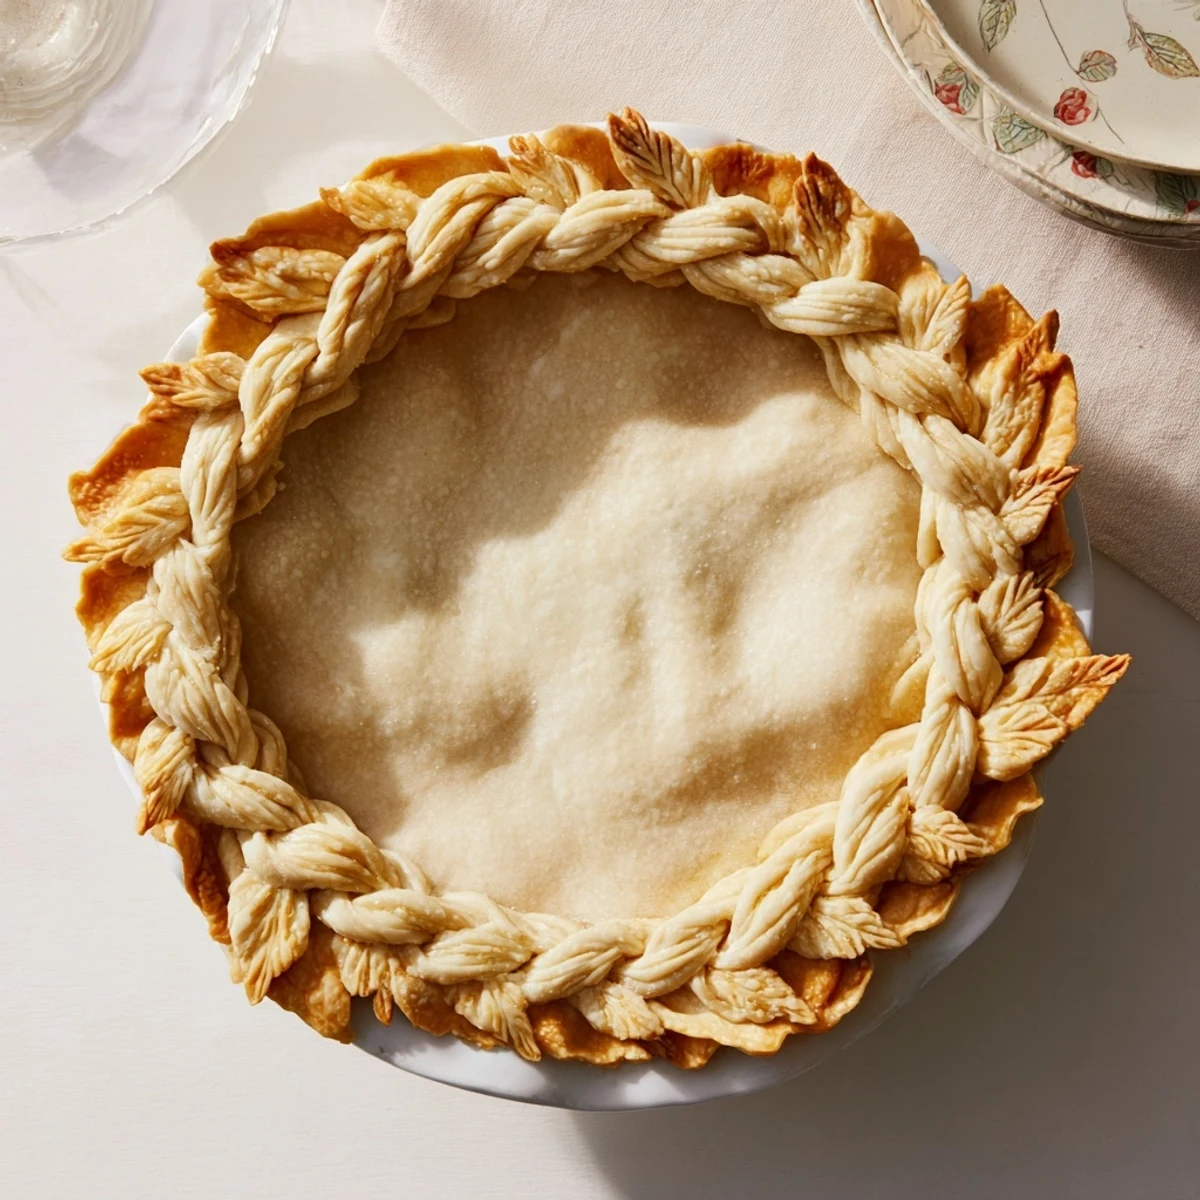
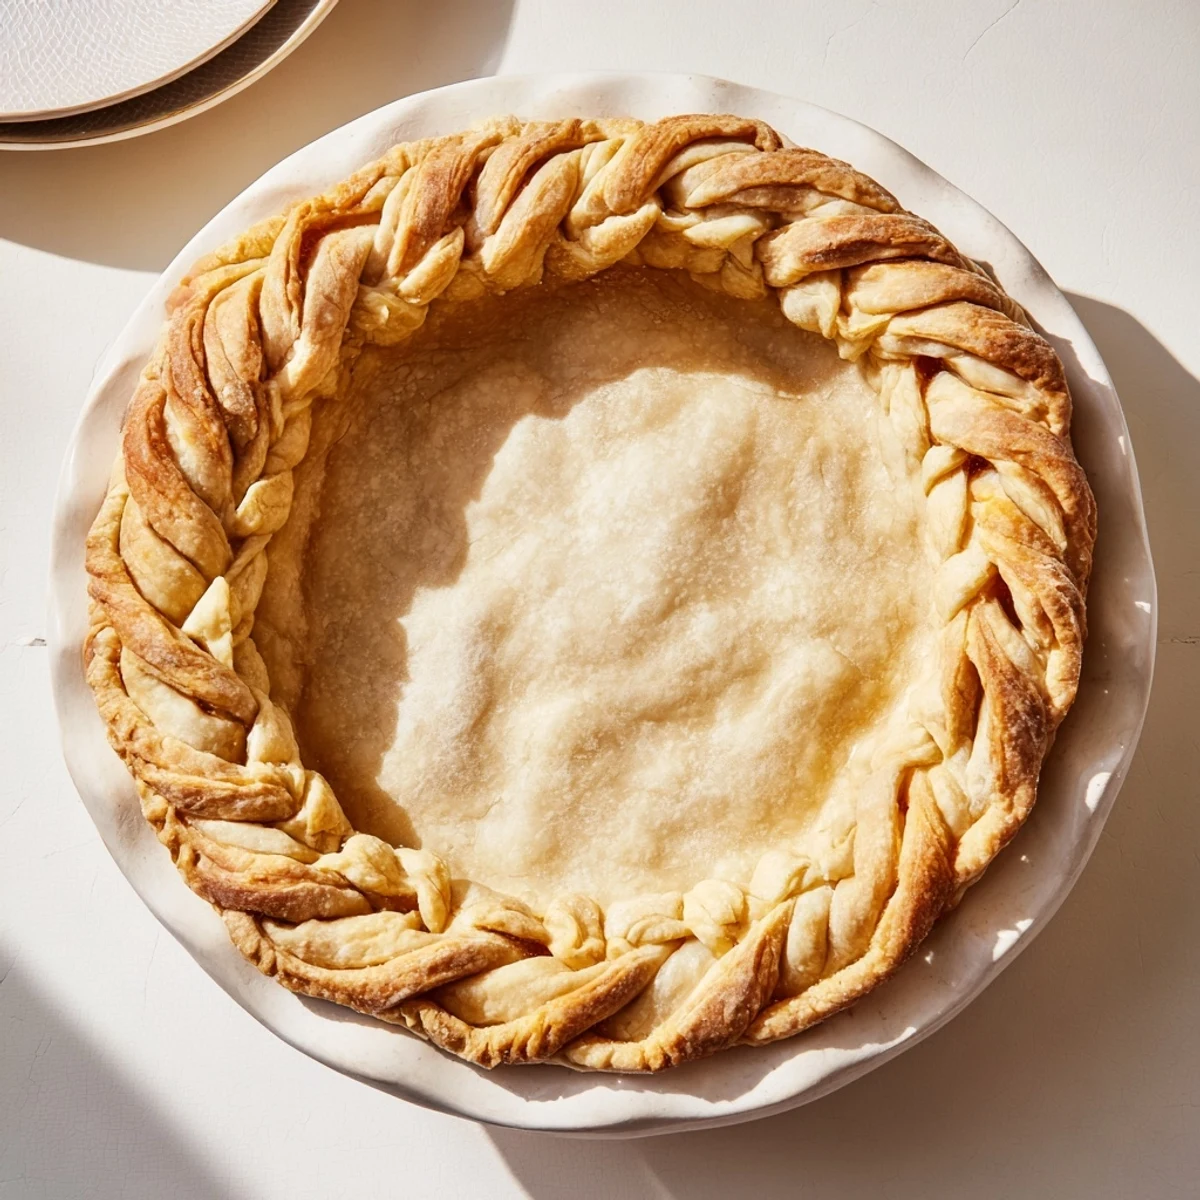
- Bake to golden perfection:
- Preheat your oven to 400°F. Brush the braids with egg wash, taking care not to let it pool in the crevices. For blind baking, line with parchment and pie weights, then bake 12 to 15 minutes until deeply golden.
 Save
Save My father, who usually regards any recipe more complicated than toast with suspicion, actually asked to learn this technique after seeing the finished pie. Now he makes fishtail crusts for his famous chicken pot pie and sends me photos every single time like a proud parent sharing report cards. Something about the rhythm of braiding seems to slow down time and turn baking into meditation.
Making The Dough Your Canvas
The beauty of this technique lies in its adaptability. I've added herbs like rosemary or thyme directly into the dough for savory pies, and a pinch of cinnamon works beautifully for autumn fruit pies. The braiding pattern catches fillings differently than traditional lattice, creating little pockets of flavor that make every bite interesting.
Getting The Right Consistency
After years of pie disasters, I finally accepted that some days need more water and some days need less. The key is stopping before the dough becomes perfectly smooth. You want those tiny bits of butter still visible, promising flaky layers in the oven. If your dough cracks while rolling, let it rest for a few minutes rather than forcing it.
Troubleshooting And Texture Tips
A truly great pie crust should shatter when you cut it but hold together when you take a bite. The braiding actually helps structurally because the overlapping strips create extra support around the edge. If you notice your braids darkening too quickly during baking, tent the pie loosely with foil for the last 10 minutes.
- Keep a small bowl of flour and a pastry brush nearby for dusting your work surface as needed
- If strips become too warm to handle, pop them in the fridge for 5 minutes and they'll cooperate again
- The egg wash isn't just cosmetic it helps seal the braids and prevents them from drying out in the oven
 Save
Save There's something deeply satisfying about serving a pie that looks like it came from a bakery window but knowing you created it with your own hands. Every time someone pulls back from the table and says "wait, did you actually make this" feels like a tiny victory worth celebrating.
Questions & Answers
- → Is fishtail braid crust difficult for beginners?
-
The technique requires some patience and practice, but breaking it into smaller strips makes it manageable. Start with simpler braided designs before attempting the full fishtail pattern.
- → Can I make this crust ahead of time?
-
Yes! Prepare the dough discs and wrap tightly in the refrigerator up to 2 days before. You can also freeze dough for up to 3 months and thaw overnight in the refrigerator before braiding.
- → What fillings work best with this decorative crust?
-
This versatile pastry complements both sweet and savory fillings. Try it with apple, cherry, or berry pies, pumpkin custard, or even quiches and chicken pot pies for an elegant presentation.
- → Why is chilling the dough important?
-
Cold butter creates flaky layers, while chilling the assembled crust prevents the braids from losing their shape during baking. The 15-minute chill ensures clean, defined details and even browning.
- → Can I skip the egg wash?
-
The egg wash provides that golden, glossy finish, but you can use cream, milk, or plant-based alternatives for different results. The crust will still bake beautifully without it, just with a more matte appearance.
- → How do I prevent the braids from burning?
-
Monitor the crust closely after 12 minutes. If browning too quickly, tent with foil. The braids are thinner than the base crust and may brown faster, so checking frequently ensures perfect results.
