 Save
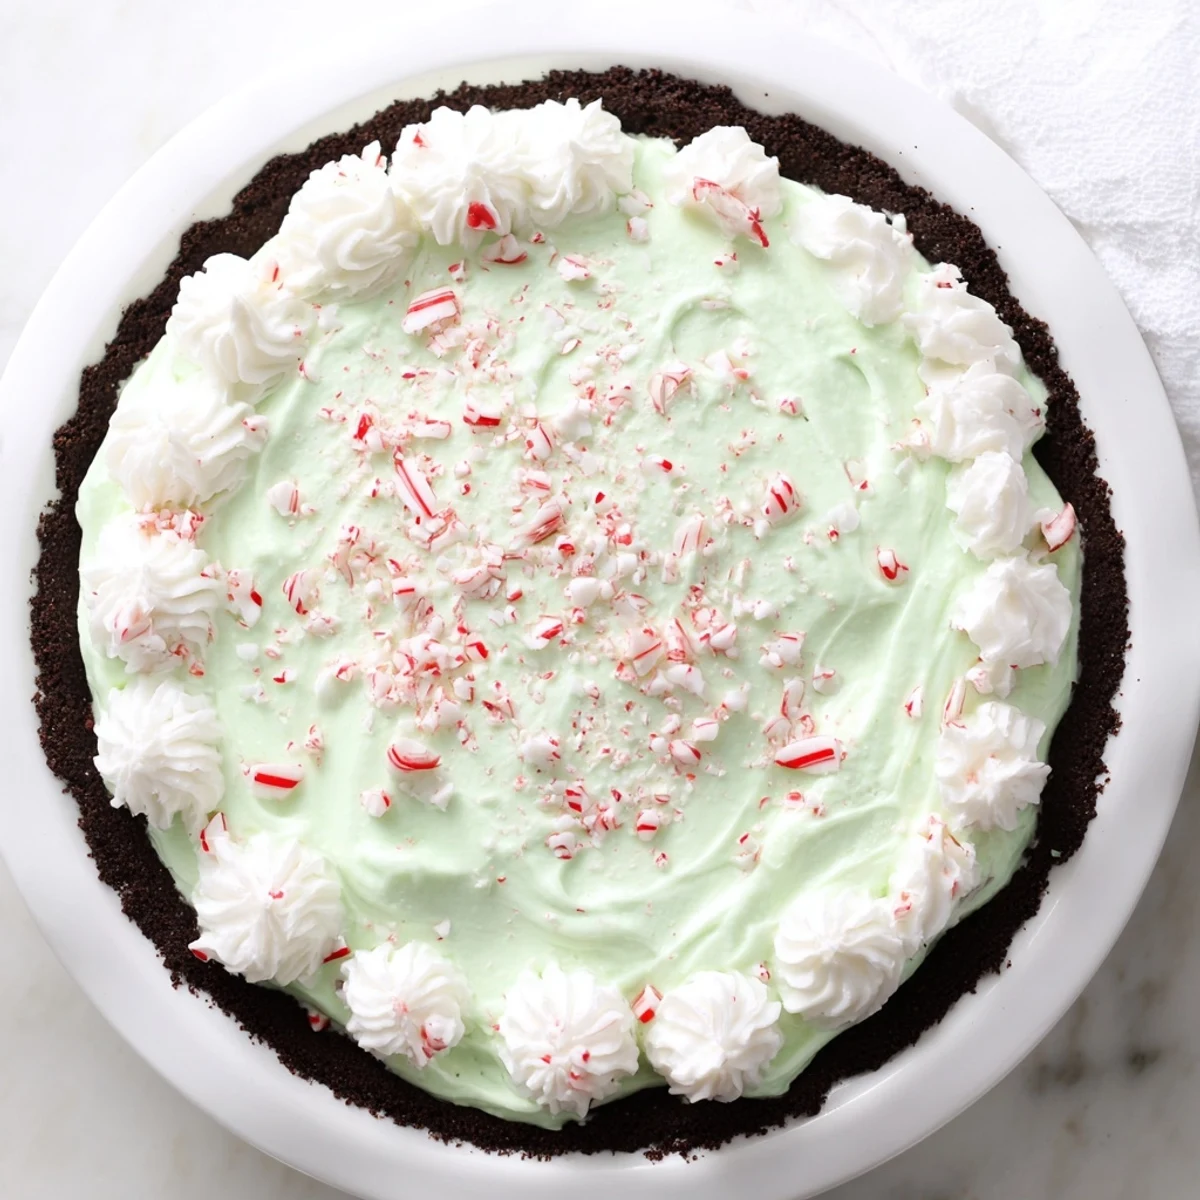
Save This dessert features a smooth peppermint-flavored cream filling set within a crisp chocolate cookie crust. The filling, thickened with milk, cream, and egg yolks, balances sweetness and a hint of mint, offering a refreshing and cool treat. Once chilled and set, it is topped with softly whipped cream lightly sweetened and garnished with crushed peppermint candies to enhance the festive taste. Ideal for holiday gatherings or whenever a minty dessert craving arises.
There's something magical about a peppermint cream pie that takes you right back to holiday gatherings and that perfect moment when someone brings out an unexpected dessert that steals the show. I still remember the first time I attempted this one—it seemed intimidating with all the tempering and chilling, but once I tasted that cool, creamy peppermint filling against the chocolate cookie crust, I was completely hooked.
I'll never forget the Christmas when my cousin arrived with unexpected guests and I had nothing prepared. I grabbed these ingredients almost by instinct and four hours later pulled out this stunning pie. Watching everyone's faces light up when they tasted it—that moment taught me that the simplest recipes often make the best memories.
Ingredients
- Chocolate sandwich cookies (200 g or about 24): I reach for the classic ones because they give you that perfect chocolate flavor without any guesswork, and crushing them by hand (or in a bag with a rolling pin) is oddly therapeutic
- Unsalted butter, melted (60 g or 4 tbsp): This is what transforms those crumbs into a sturdy crust that holds everything together
- Whole milk and heavy cream (250 ml each): The combination gives you that luxurious texture, not too heavy but impossibly creamy
- Granulated sugar (100 g or 1/2 cup): This sweetens without overpowering that peppermint punch
- Cornstarch (30 g or 1/4 cup): The secret ingredient that transforms liquid into a silky custard—don't skip it or you'll have peppermint soup
- Salt (1/4 tsp): Just enough to make the peppermint sing
- Egg yolks (4 large): These create that rich, velvety filling when properly tempered
- Unsalted butter (2 tbsp): Added at the end for extra richness and shine
- Pure peppermint extract (1 tsp): Use pure, not imitation—the difference is night and day
- Food coloring, optional (a few drops): Pink or red gives it that festive look, but it's purely for show
- Heavy whipping cream, cold (250 ml or 1 cup): For the topping—use the coldest cream you can find
- Powdered sugar (2 tbsp): Just enough sweetness for the whipped cream
- Vanilla extract (1/2 tsp): A whisper of vanilla in the whipped cream rounds everything out
- Crushed peppermint candies: For garnish—the final flourish that makes it feel special
Instructions
- Get Your Oven Ready:
- Preheat to 175°C (350°F). You want it hot and ready for that crust.
- Build Your Chocolate Foundation:
- Combine your crushed cookies with melted butter in a medium bowl until it looks like wet sand. Press it firmly into the bottom and up the sides of a 23 cm (9-inch) pie dish—use the bottom of a measuring cup to really pack it down. Those gaps will let the filling seep through if you're not careful.
- Toast the Crust:
- Bake for 8 to 10 minutes until it smells nutty and set, then let it cool completely on a wire rack. This matters more than you'd think.
- The Part Where Magic Happens:
- In a medium saucepan, whisk together milk, cream, sugar, cornstarch, and salt. This is your base. Turn the heat to medium and stir constantly. Watch it like you're waiting for a phone call—in about 3 to 5 minutes it'll start to thicken and bubble slightly. You'll feel the change under your whisk.
- Temper Those Yolks:
- In a separate bowl, whisk your egg yolks. This is crucial: gradually whisk about 1/2 cup of the hot mixture into the yolks, stirring constantly. This slowly brings them up to temperature so they don't scramble. Then pour that yolk mixture back into the saucepan with the rest of the hot custard, still whisking.
- The Final Thicken:
- Keep whisking constantly over medium heat for 2 to 3 minutes. You're looking for the moment when it becomes noticeably thick and just starts to boil—you'll see big bubbles breaking the surface. That's your signal to stop.
- Add the Peppermint Magic:
- Remove from heat. Stir in the 2 tablespoons of butter, peppermint extract, and food coloring if you're using it. Breathe in that peppermint aroma—this is what you were working toward.
- Into the Crust:
- Pour the filling into your cooled crust and smooth the top with a spatula. It should be silky smooth.
- The Waiting Game:
- Cover with plastic wrap, pressing it directly onto the surface of the filling to prevent that papery skin from forming. This is non-negotiable. Refrigerate for at least 4 hours or until the filling is completely set. Overnight is even better if you have the time.
- The Crowning Glory:
- When you're ready to serve, beat your cold heavy cream with powdered sugar and vanilla extract until soft peaks form—not stiff, just soft and billowy. Spread or pipe it over the chilled pie, then scatter crushed peppermint candies on top like you're decorating a tiny candy land.
- Serve with Pride:
- Slice and serve chilled. Each slice should have all three layers: chocolate crust, creamy peppermint filling, and fluffy whipped cream.
 Save
Save Years later, this pie has become the dessert I reach for when someone special is coming over or when the holiday table needs something that feels both comforting and a little bit fancy. It's the recipe that proved to me that sometimes the best kitchen victories come from staying calm and following your instincts.
Keeping It Fresh
This pie actually keeps beautifully in the refrigerator for up to three days, which means you can make it the morning of a party and not stress about last-minute assembly. Cover it loosely with plastic wrap once the whipped cream is on (you don't want the wrap to smudge your carefully piped topping). The flavors actually meld and deepen slightly as it sits, so day two is sometimes better than day one.
When You're Missing Something
Don't have peppermint extract? You can crush actual peppermint candies and steep them in the hot filling, though you'll need to strain them out. Running low on chocolate cookies? A mix of chocolate wafers and regular cookies works fine. No cornstarch? Flour works in a pinch, though your filling will be slightly less silky. Can't find heavy cream? You can make it work with milk and butter, though you'll lose some of that luxury feel.
Serving Ideas That Clicked
This pie is perfect on its own, but I've learned through experience that a few simple things make it even better. A warm mug of hot chocolate alongside each slice is a flavor combination that tastes like winter feels. Strong black coffee cuts through the sweetness beautifully if you're serving it after a heavy meal. For smaller appetites, those thin slices go a long way because the flavors are so concentrated.
- Serve directly from the refrigerator—any warmth will make the filling slump
- A hot knife rinsed between slices gives you clean cuts and impressive plating
- If you have extra crushed peppermint candies, scatter a few more on the plate around the slice for garnish
 Save
Save This peppermint cream pie has become the recipe I return to whenever I want to feel like I've spent hours in the kitchen, even though it's surprisingly manageable. Make it once and you'll understand why it's a keeper.
Questions & Answers
- → How do I ensure the crust stays firm?
-
Press the crushed chocolate cookies firmly into the pie dish and bake for 8-10 minutes before cooling completely. This sets the base for better stability.
- → Can I substitute peppermint extract with fresh mint?
-
Fresh mint may alter the texture and intensity, but peppermint extract provides a concentrated minty flavor that blends smoothly with the cream filling.
- → What is the purpose of chilling the pie for several hours?
-
Chilling allows the filling to fully set and thicken, ensuring a creamy yet firm texture when sliced and served.
- → How can I make the whipped topping fluffier?
-
Use cold heavy cream and beat it with powdered sugar and vanilla extract until soft peaks form for a light and airy topping.
- → Is it possible to make a gluten-free version?
-
Yes, simply replace the chocolate sandwich cookies with gluten-free chocolate cookies to maintain the crust's texture and flavor.
- → Can the color of the filling be changed?
-
Adding a few drops of pink or red food coloring creates a subtle pink hue without affecting the peppermint flavor.
