 Save
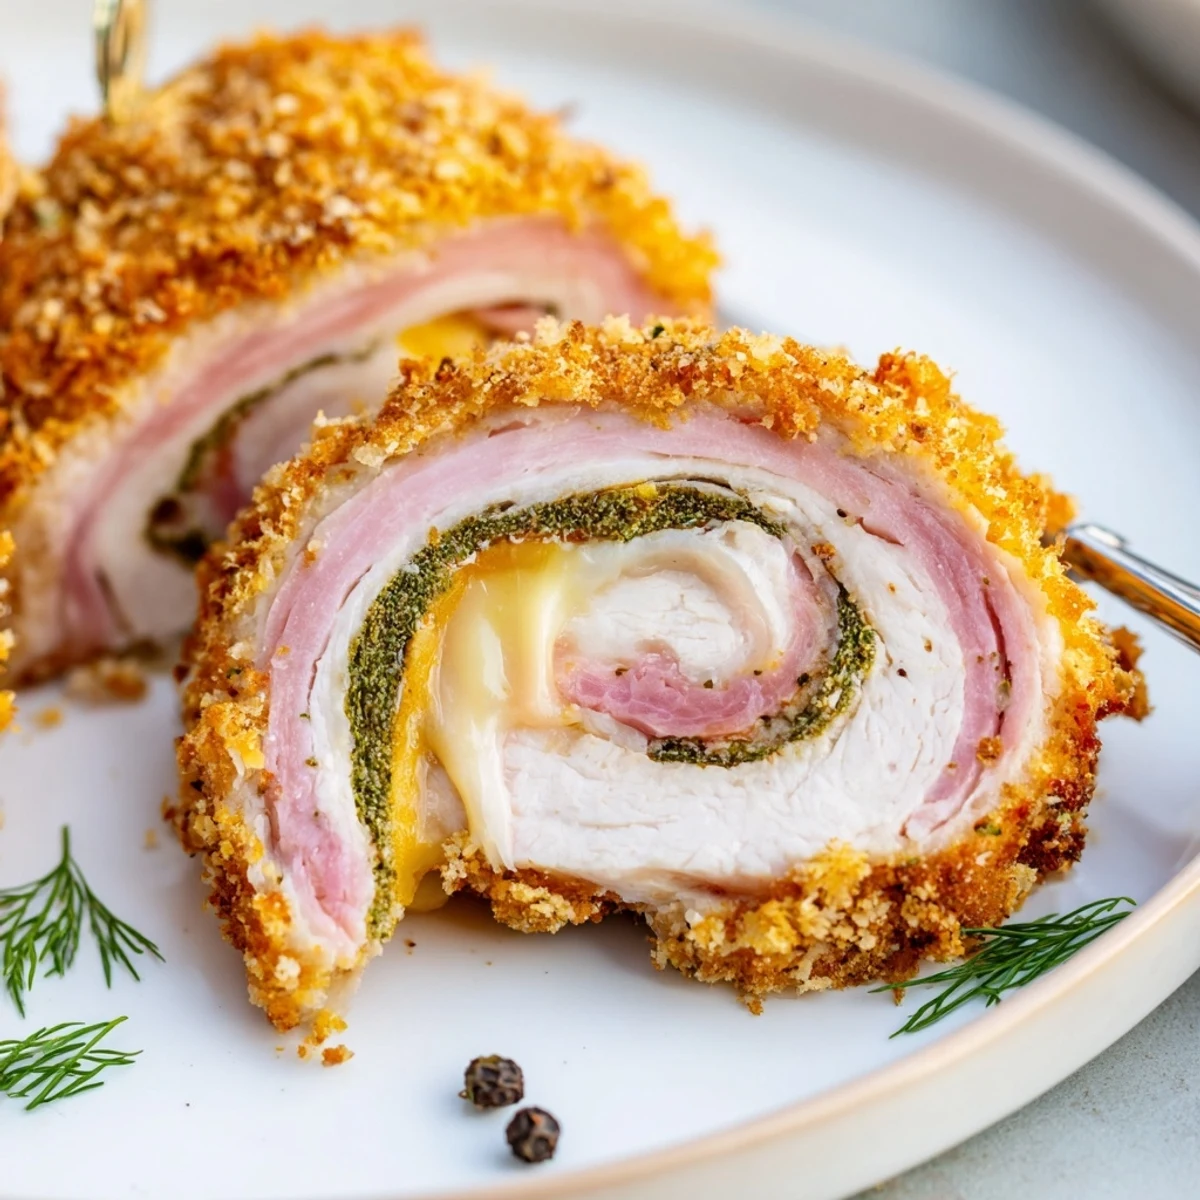
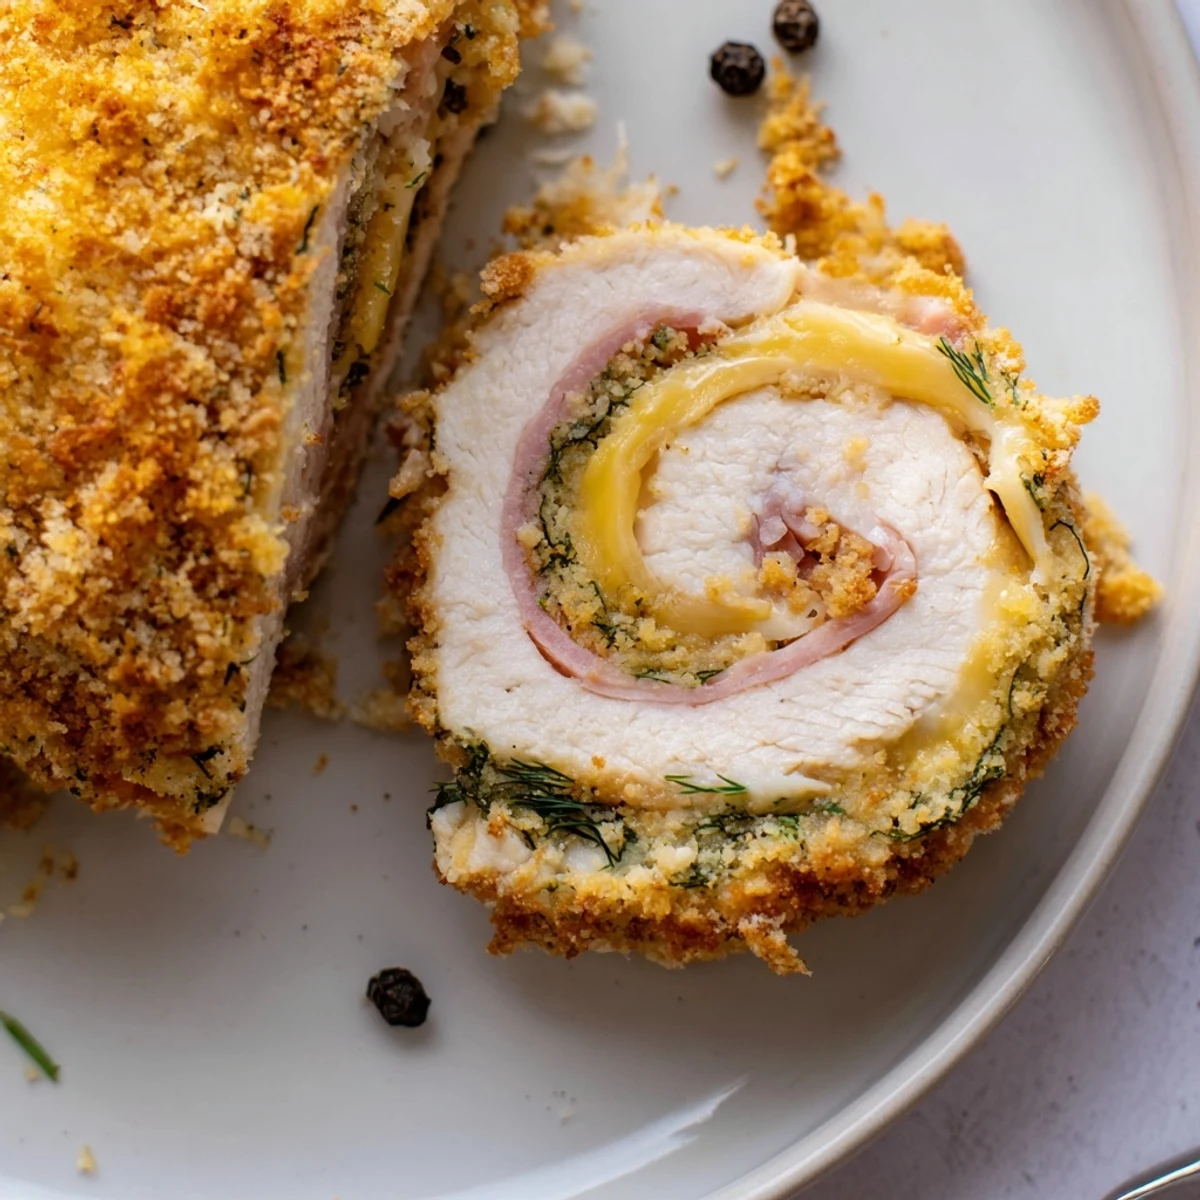
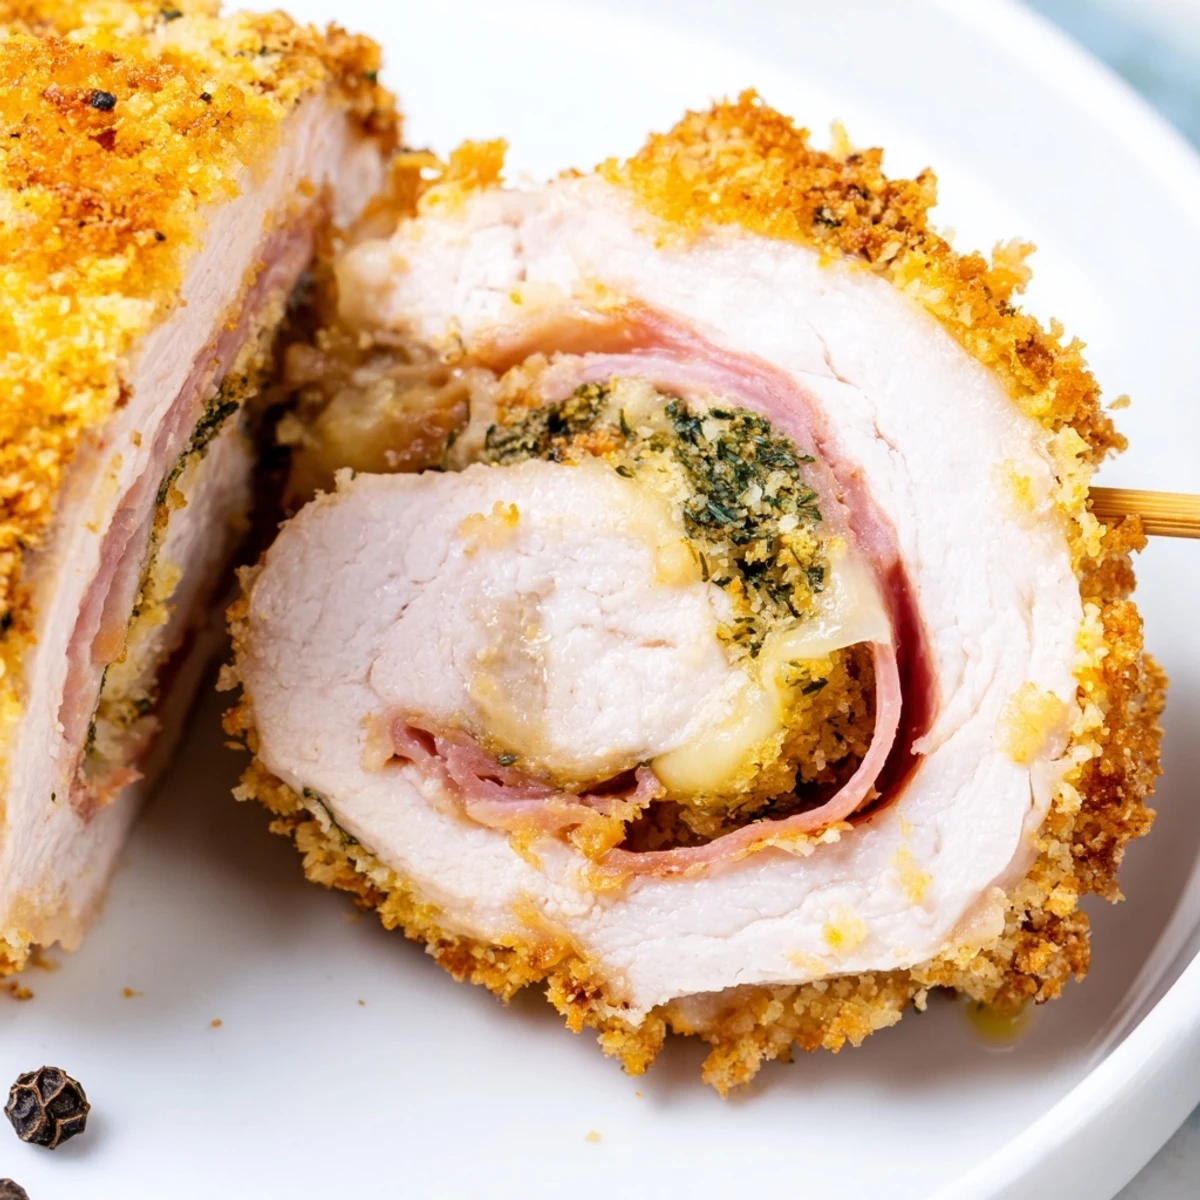
Save Brine chicken breasts in dill pickle juice for at least an hour to infuse tang and tenderize. Butterfly and pound thin, layer with Swiss or provolone, herbs and optional ham, then roll and secure. Dredge in flour, egg and panko seasoned with garlic and smoked paprika. Fry briefly for color then finish in a 400°F oven, or bake until golden and cooked through. Rest, slice and serve with a crisp salad or potato salad.
My neighbor Dave knocked on my door one July evening holding a jar of pickle juice and a look of absolute seriousness on his face. He claimed the liquid gold was the secret to the best chicken he had ever eaten and dared me to prove him wrong. That night my kitchen smelled like a deli had collided with a fried chicken joint, and honestly I was not mad about it.
I served these rolls at a backyard gathering the following weekend and watched three grown adults fall completely silent after their first bite, which is honestly the highest compliment any cook can receive.
Ingredients
- Pickle juice (1 cup): Use the juice straight from a jar of dill pickles and do not skimp on quality because this is the foundation of all the flavor.
- Sugar (1 tablespoon): Just enough to round out the sharp acidity of the brine and help the chicken caramelize beautifully during cooking.
- Black peppercorns (1 teaspoon): Whole peppercorns infuse a gentle warmth without overpowering the pickle tang.
- Chicken breasts (4 boneless, skinless): Buy evenly sized breasts so they brine and cook at the same rate, avoiding dry edges on smaller pieces.
- Swiss or provolone cheese (4 slices): Provolone melts into a creamy stretch while Swiss adds a slightly nutty note that pairs surprisingly well with the brine.
- Deli ham, optional (4 slices): A thin layer of ham adds smoky saltiness and turns this into something close to a chicken cordon bleu reimagined.
- Fresh dill or parsley (2 tablespoons, chopped): Fresh herbs brighten the rich filling and echo the dill flavor already building from the brine.
- All-purpose flour (1 cup): The first coat in your breading station creates the dry surface the egg needs to grip onto.
- Eggs (2 large, beaten): The binding layer that holds the breadcrumbs in place and contributes to that shatteringly crisp exterior.
- Panko breadcrumbs (1.5 cups): Panko creates an airier, crunchier crust than regular breadcrumbs and is absolutely worth seeking out.
- Garlic powder (1 teaspoon): Distributes evenly across the coating for consistent savory flavor in every bite.
- Smoked paprika (half teaspoon): Adds a subtle smokiness and gives the crust a beautiful warm golden color.
- Vegetable oil or melted butter (quarter cup): Essential for getting that fried quality whether you pan fry or simply drizzle before baking.
Instructions
- Brine the chicken:
- Combine the pickle juice, sugar, and peppercorns in a large bowl or resealable bag, then submerge the chicken breasts and refrigerate for at least one hour or up to four hours for maximum flavor penetration.
- Prep for cooking:
- Preheat your oven to 400 degrees Fahrenheit if baking, and line a baking sheet with parchment paper so cleanup is effortless later.
- Flatten the breasts:
- Remove the chicken from the brine, pat each piece thoroughly dry with paper towels, butterfly each breast by slicing horizontally almost through the center and opening it like a book, then pound between plastic wrap to a quarter inch thickness.
- Build the rolls:
- Lay a slice of cheese, a slice of ham if using, and a generous sprinkle of fresh herbs on each flattened breast, season lightly with salt and pepper, then roll up tightly tucking in the sides and secure with toothpicks.
- Set up breading station:
- Arrange three shallow bowls side by side with flour in the first, beaten eggs in the second, and panko mixed with garlic powder and smoked paprika in the third so you can move through them in one smooth motion.
- Coat the rolls:
- Dredge each rolled chicken piece in flour first shaking off excess, dip into egg coating completely, then roll in the seasoned panko pressing gently so the breadcrumbs adhere firmly to every surface.
- Cook to golden perfection:
- For frying heat oil in a skillet over medium heat and cook the rolls turning every few minutes until all sides are deeply golden, then transfer to the oven for fifteen minutes to finish cooking through, or alternatively bake directly at 400 degrees for 25 to 30 minutes drizzled with melted butter until the crust is crisp and the internal temperature reaches 165 degrees.
- Rest and serve:
- Let the rolls rest for five minutes so the cheese settles and the juices redistribute, then carefully remove toothpicks, slice into pinwheels, and serve while hot and crunchy.
 Save
Save The real magic happens when you slice into one of these rolls and the cheese stretches in a long golden thread while steam rises from the juicy center.
Choosing Your Pickle Juice
Not all pickle juice is created equal and the one you choose will define the entire personality of this dish. Classic dill pickle juice delivers a clean, briny tang, while bread and butter pickle juice adds a sweeter, almost candied note that works beautifully if you prefer a milder flavor profile.
Frying Versus Baking
Both methods produce excellent results but they are different experiences entirely, so choose based on your mood and how much attention you want to give the stove. Pan frying followed by a short oven finish gives you the most complex crust with crispy edges and a slightly chewy interior layer, while straight baking is hands off and slightly lighter while still delivering serious crunch from the panko.
Serving and Storing
These rolls are best eaten fresh when the contrast between the shatteringly crisp exterior and the molten cheese interior is at its peak, but they do reheat surprisingly well if you know the trick. A quick stint in a 375 degree oven for about ten minutes brings back much of the original crunch without drying out the chicken.
- Serve alongside a vinegar based potato salad or creamy coleslaw to echo the tangy theme.
- Spicy pickle juice can completely change the personality of this dish in the best way possible.
- Always remember to count your toothpicks before serving so nobody gets an unexpected surprise.
 Save
Save Dave never did get his pickle jar back, but he showed up the next weekend with a fresh one and a request for round two. Some recipes just earn a permanent spot in your rotation like that.
Questions & Answers
- → How long should I brine the chicken?
-
Brine for a minimum of 1 hour and up to 4 hours in the refrigerator. Short brines add tang and tenderness; avoid much longer times to prevent an overly salty, mushy texture.
- → Which cheese melts best inside the rolls?
-
Swiss or provolone are classic for their meltability and mild flavor, but Gruyère, mozzarella, or a semi-soft cheddar also work well. Choose a cheese that melts without releasing too much liquid.
- → Can I make these gluten-free?
-
Yes—swap the all-purpose flour and panko for gluten-free flour and gluten-free breadcrumbs. Tap the coated rolls gently to remove excess crumbs for even browning.
- → Should I fry or bake the rolls?
-
For the crispiest crust, pan-fry briefly on all sides to develop color, then finish in a 400°F oven until cooked through. For a lighter approach, bake with a drizzle of oil until golden.
- → How do I keep the rolls from leaking filling?
-
Pound breasts evenly and roll tightly, tucking edges under. Chill or rest rolls briefly before breading so seams seal better, and secure with toothpicks if needed.
- → How should leftovers be stored and reheated?
-
Store cooled rolls in an airtight container in the refrigerator for up to 3 days. Reheat in a 350°F oven until warmed through to preserve crispness, or use an air fryer for quicker reheating.
