 Save
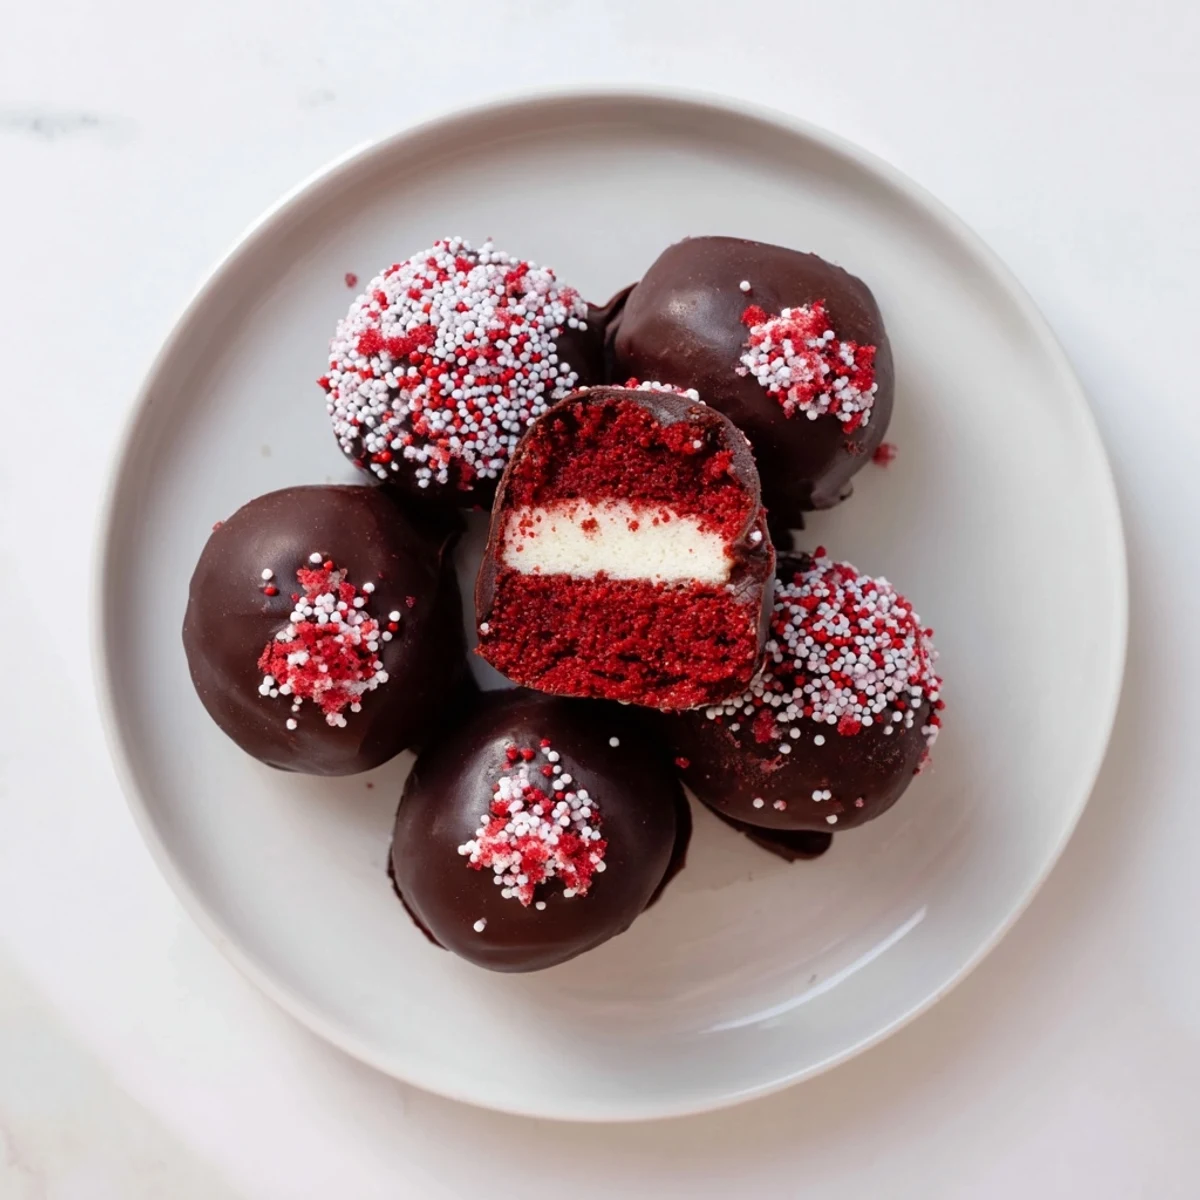
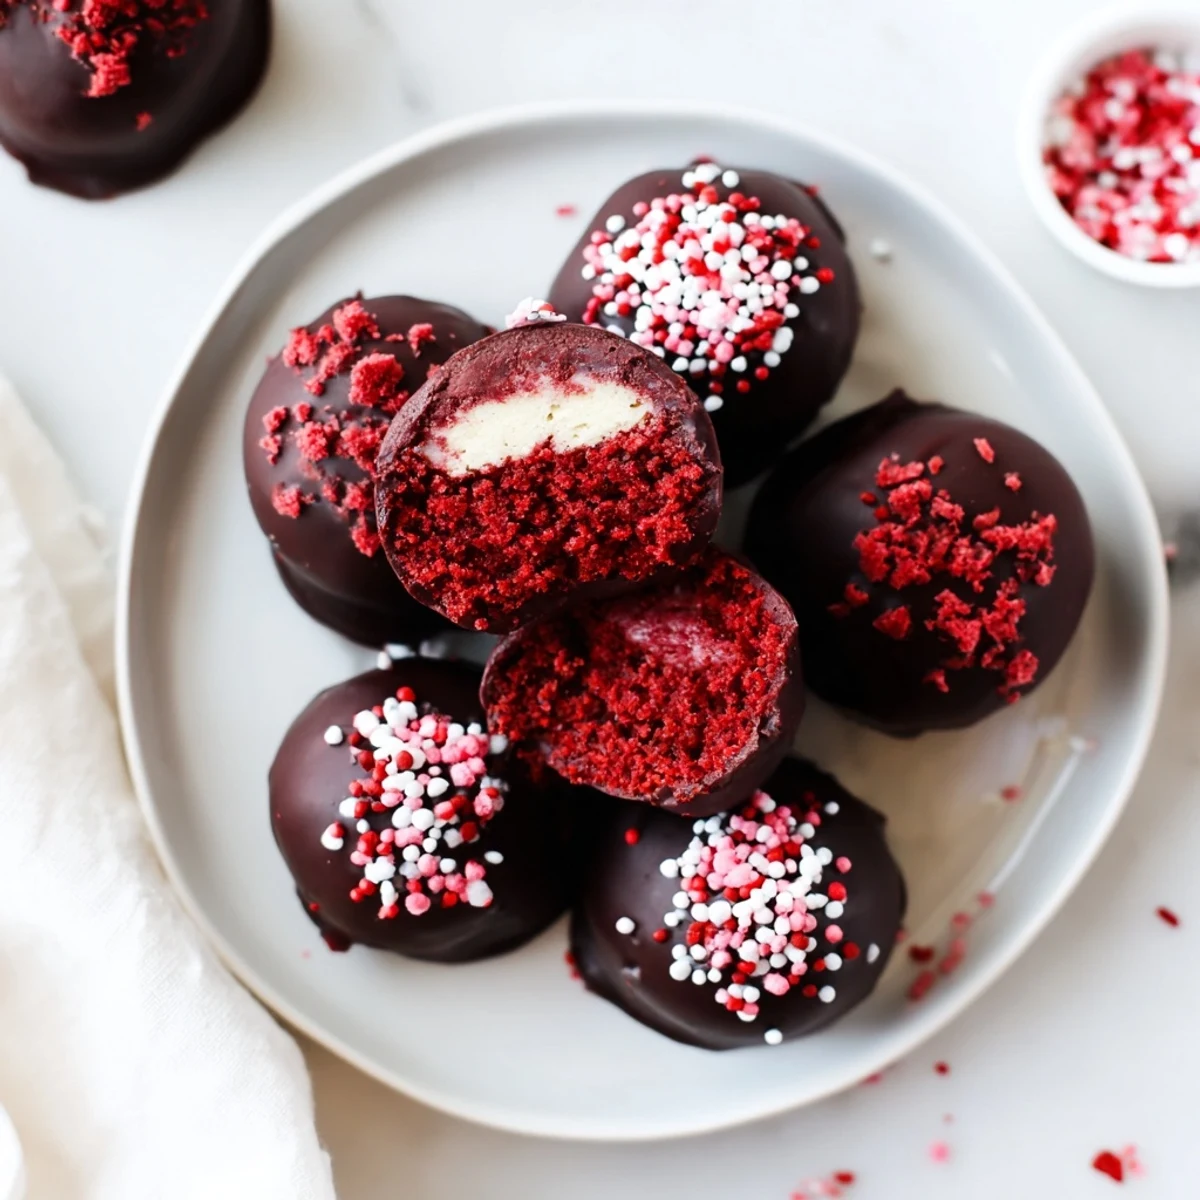
Save These irresistible red velvet cheesecake balls combine the rich, moist texture of classic red velvet cake with a smooth, creamy cheesecake center. Each bite-sized sphere is hand-rolled and dipped in your choice of white or dark chocolate, creating a stunning dessert that's as beautiful as it is delicious.
The process begins with baking a from-scratch red velvet cake using traditional ingredients like buttermilk, cocoa powder, and just the right amount of red food coloring. Once cooled, the cake is crumbled and mixed with a sweetened cream cheese filling that adds tangy richness to every bite.
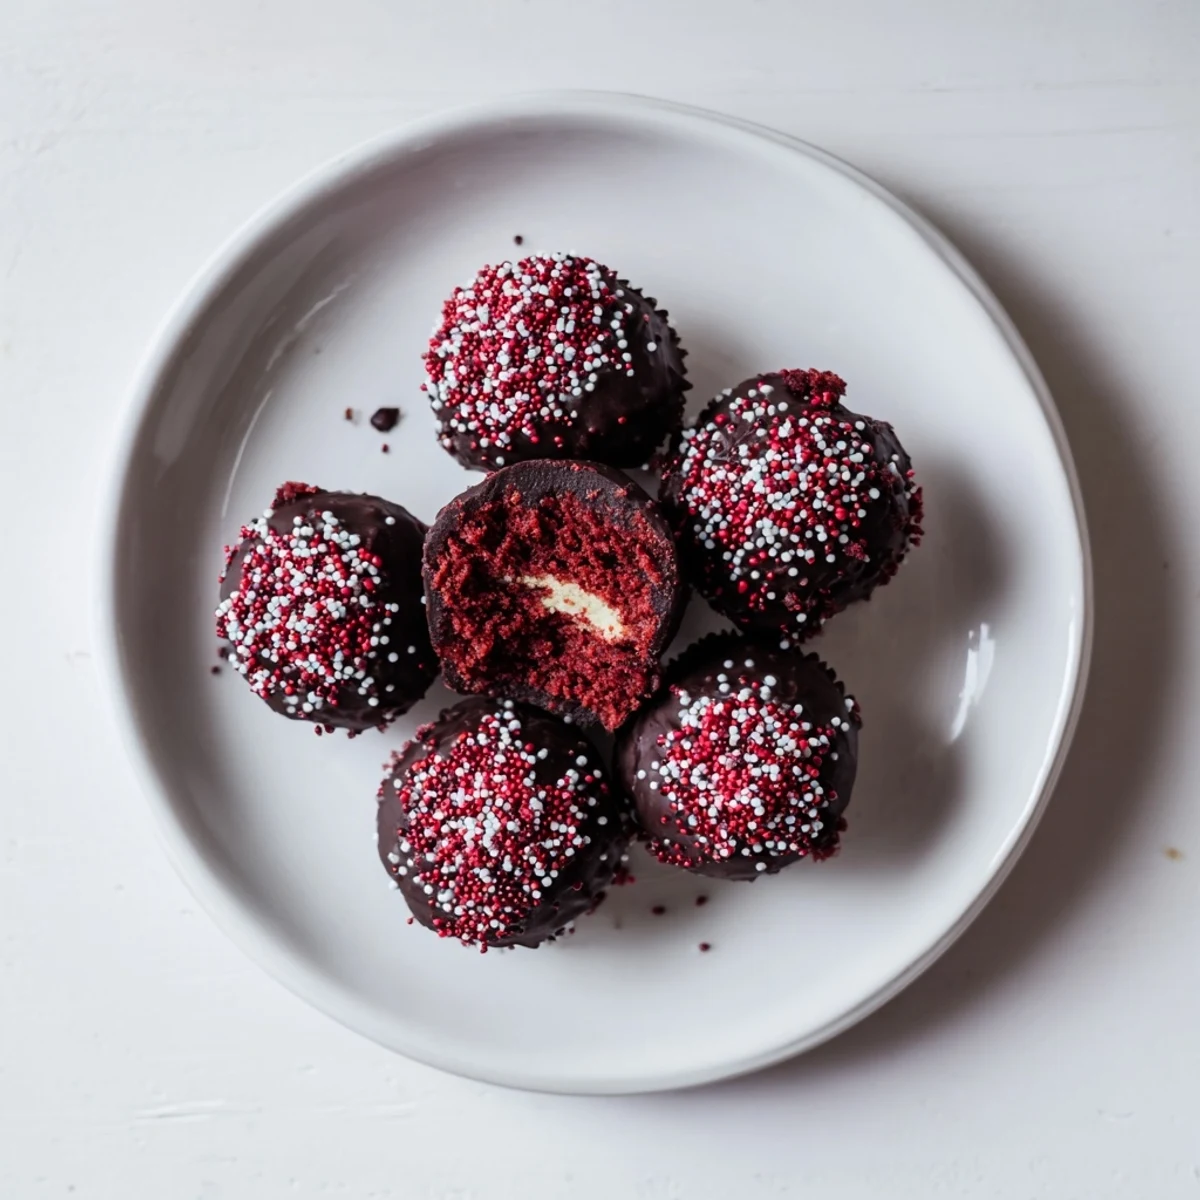
After freezing the mixture to achieve the perfect consistency, each ball is carefully dipped in melted chocolate and finished with festive sprinkles. The result is a crowd-pleasing dessert that's ideal for holiday parties, Valentine's Day gatherings, or anytime you crave something special.
These treats can be made ahead and stored in the refrigerator for up to a week, or frozen for longer storage. They're surprisingly simple to prepare, requiring just 30 minutes of active time plus chilling. The recipe yields 24 balls, making it perfect for sharing.
The kitchen smelled like a bakery had collided with a candy shop, and honestly, that is the best way I can describe the afternoon I whipped up these red velvet cheesecake balls for my neighbors holiday party. I had volunteered to bring something, waited until the last possible moment, and then panicked in the most delicious way possible. Three hours later I walked in with a tray of glossy chocolate coated bites that disappeared before the cheese plate even got touched.
My friend Marcus grabbed one, bit through the shell, and froze mid chew with wide eyes like he had just discovered something illegal. He then proceeded to eat six more in the span of ten minutes and asked if I could make fifty of them for his upcoming birthday.
Ingredients
- All purpose flour (1 1/4 cups): Sift it to keep the cake tender and avoid any surprise dense pockets in your crumb.
- Granulated sugar (3/4 cup): This feeds the structure and adds just enough sweetness without overwhelming the cocoa.
- Unsweetened cocoa powder (2 tbsp): Red velvet is not just a chocolate cake with dye, and this small amount gives it that signature subtle depth.
- Baking soda (1/2 tsp): A little goes a long way in keeping the cake light.
- Salt (1/4 tsp): Do not skip this, it rounds out every flavor in the cake.
- Buttermilk (1/2 cup, room temperature): The tang here is what makes red velvet special, so please use real buttermilk if you can find it.
- Unsalted butter (1/2 cup, softened): Let it sit out until it yields to a gentle press, cold butter will leave you with lumpy batter.
- Large eggs (2, room temperature): Room temp eggs blend more smoothly into the batter and help the cake rise evenly.
- Vanilla extract (1 tsp): Use the good stuff here since it carries the flavor alongside the cocoa.
- Red food coloring (1 tbsp): Gel coloring gives you that vivid red without thinning out your batter.
- Cream cheese (8 oz, softened): Full fat is non negotiable for a creamy, sturdy filling that holds its shape inside the ball.
- Powdered sugar (1/4 cup): It sweetens the filling gently and helps it firm up for rolling.
- Vanilla extract (1/2 tsp): A second dose of vanilla in the filling makes the cheesecake layer sing.
- White or dark chocolate (10 oz): Melting wafers are the easiest path to a smooth, snappy coating that sets quickly.
- Sprinkles (optional): A quick scatter of red sprinkles on top makes them look festive with almost zero effort.
Instructions
- Bake the Red Velvet Cake:
- Preheat your oven to 350 degrees F and line an 8 by 8 inch pan with parchment. Whisk the dry ingredients together, then beat the wet ones separately until that gorgeous red color is uniform, fold them together gently, pour into the pan, and bake for 18 to 20 minutes until a toothpick slides out clean.
- Whip the Cheesecake Filling:
- Beat the softened cream cheese with powdered sugar and vanilla until the mixture is completely smooth and plush, like frosting you want to eat with a spoon.
- Build the Balls:
- Crumble the cooled cake into fine pieces in a big bowl, add the cheesecake mixture, and work it together with your hands until it forms a cohesive dough that holds together when squeezed. Roll into one inch balls and set them on a parchment lined sheet.
- Freeze Until Firm:
- Slide the tray into the freezer for a full hour so the balls are rock solid before they take a dip in warm chocolate.
- Dip and Coat:
- Melt the chocolate in 20 second bursts, stirring between each, then lower each frozen ball in with a fork, tap off the excess, and set it back on the parchment before scattering sprinkles over the wet shell.
 Save
Save There is something deeply satisfying about peeling a perfectly set chocolate shell off parchment paper and hearing that tiny snap when you bite through it.
Choosing Your Chocolate Coating
White chocolate gives a creamy sweetness that mirrors classic cheesecake toppings, while dark chocolate adds a slightly bitter edge that balances everything out. Ruby chocolate is the wildcard option that turns the whole thing pink and tastes like berries collided with cocoa.
Making Them Your Own
A tablespoon of Chambord or Baileys stirred into the cheesecake filling transforms these from party treats into something genuinely adult. You can also roll the finished balls in crushed graham crackers before the chocolate sets for a cheesecake crust vibe.
Storage and Make Ahead Strategy
These keep for a full week in the fridge in an airtight container, and they freeze for up to a month, which makes them ideal for batch cooking before a busy week.
- Layer parchment between stacked balls so the chocolate shells do not stick together.
- Thaw frozen balls in the fridge overnight rather than on the counter to prevent condensation from dulling the finish.
- Always serve them slightly chilled for the best texture and the cleanest bite.
 Save
Save Every time I make these, someone asks for the recipe, and I always smile because the secret is how simple they actually are. Whip up a batch, share them generously, and watch people lose their composure over a bite sized ball of joy.
Questions & Answers
- → Can I use a boxed red velvet cake mix instead of making it from scratch?
-
Yes, you can substitute a boxed red velvet cake mix for the homemade version. Prepare according to package instructions, but consider reducing the oil slightly since the cheesecake filling already provides moisture. The results will still be delicious and save time.
- → How long do these need to chill before dipping in chocolate?
-
The formed balls need to freeze for at least 1 hour to become firm enough to handle without falling apart during the dipping process. You can leave them in the freezer longer if needed—up to overnight. Just don't let them freeze completely solid, or they may crack when dipped.
- → What type of chocolate works best for coating?
-
Both white and dark chocolate create beautiful contrasts with the red velvet interior. White chocolate provides a classic snow-like appearance, while dark chocolate offers a sophisticated look. For best results, use chocolate wafers or baking chocolate specifically designed for melting, as they contain stabilizers that help create a smooth, glossy coating.
- → Can I add alcohol to the cheesecake mixture?
-
Absolutely! Adding 1-2 tablespoons of liqueur like Bailey's Irish Cream, Chambord, or Kahlúa to the cream cheese mixture creates an adult version with sophisticated flavor notes. The alcohol adds depth without overpowering the other flavors and helps create a slightly softer texture.
- → How should I store these red velvet cheesecake balls?
-
Store the completed treats in an airtight container in the refrigerator for up to 1 week. For longer storage, place them in a freezer-safe container and freeze for up to 1 month. When freezing, separate layers with parchment paper to prevent sticking. Thaw in the refrigerator before serving.
- → Why did my chocolate coating turn out streaky or blotchy?
-
This happens when chocolate seizes due to moisture or overheating. Make sure your dipping tools and hands are completely dry. If microwaving, heat in 20-second intervals and stir between each. For the smoothest results, temper your chocolate or use coating wafers specifically formulated for candy making.
