 Save
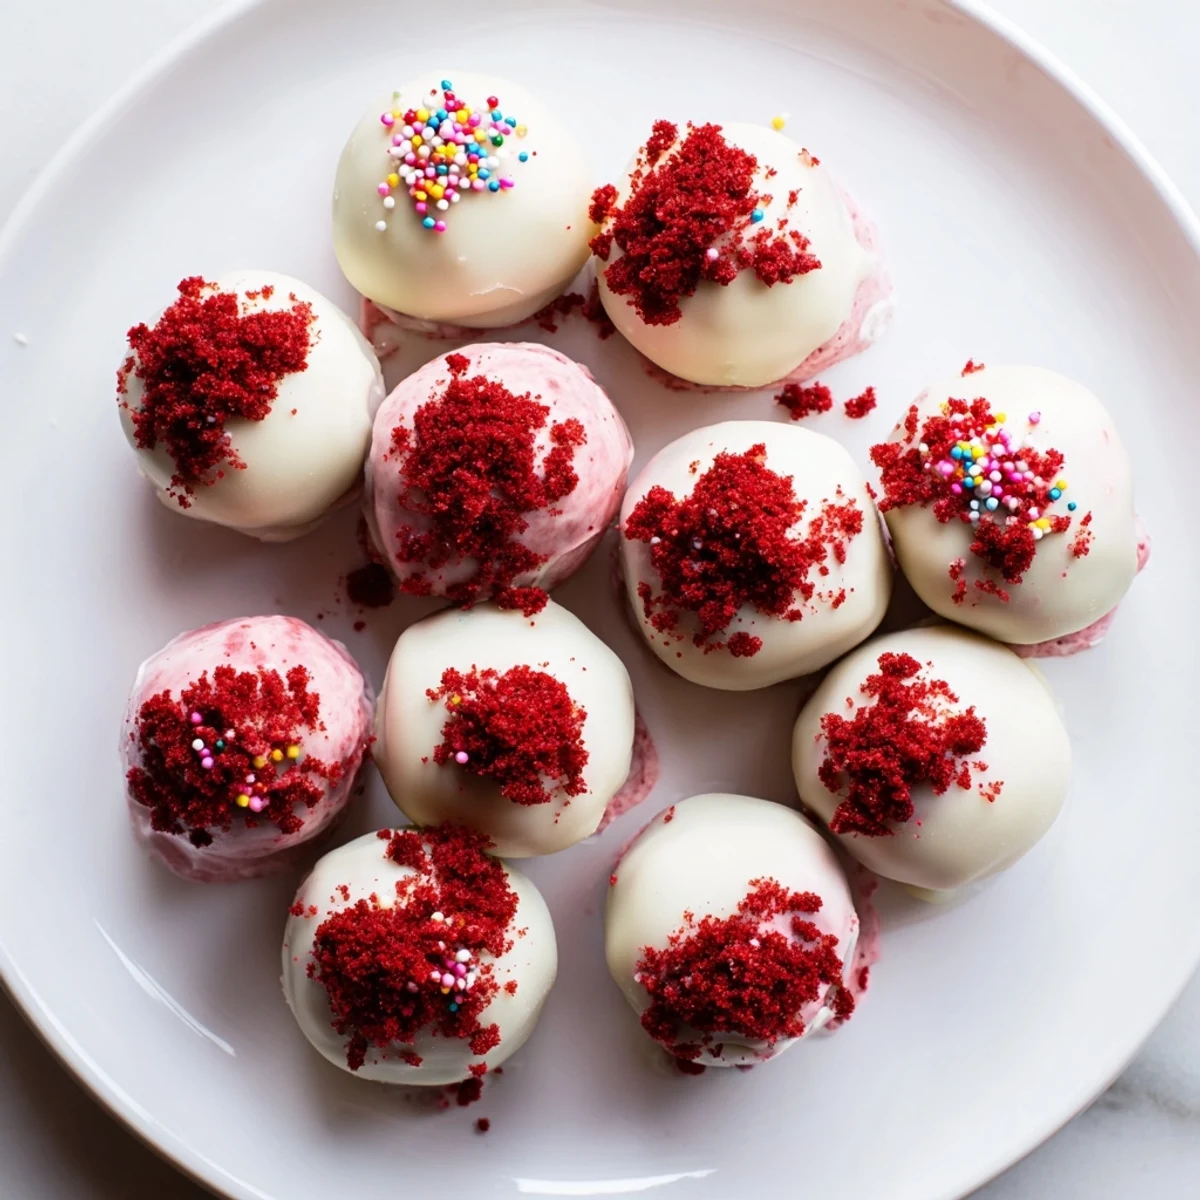
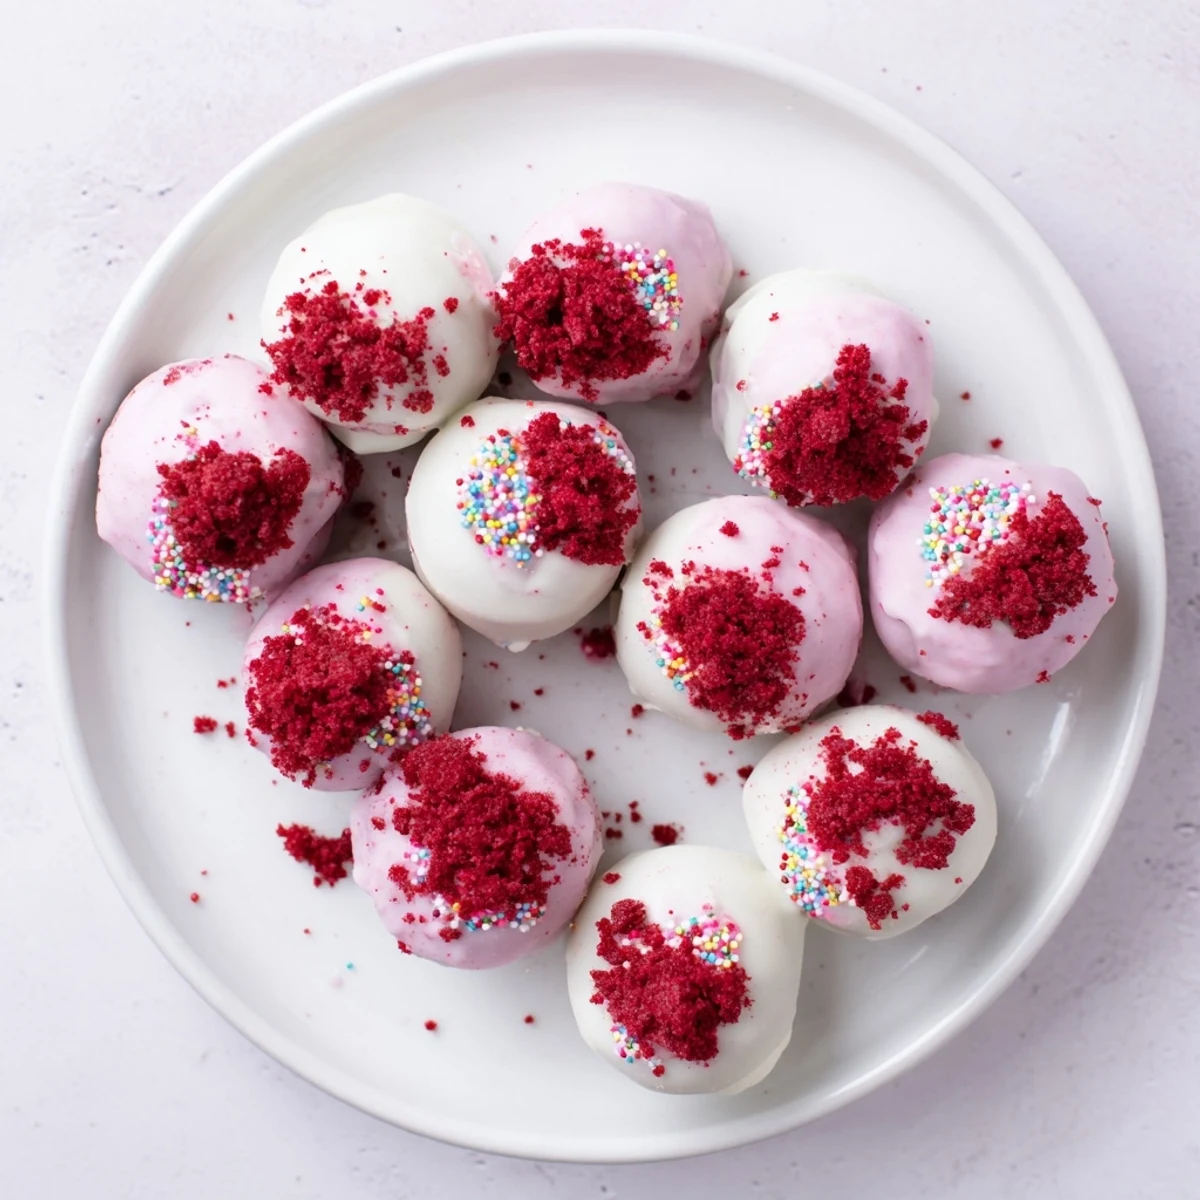
Save Creamy cheesecake filling meets crumbled red velvet cake in these irresistible bite-sized treats. The mixture is rolled into balls, chilled until firm, then dipped in melted white or dark chocolate for a decadent coating. Each bite delivers the perfect balance of rich chocolate, tangy cream cheese, and signature red velvet flavor. These elegant dessert balls are ideal for entertaining, holiday gatherings, or whenever you crave something sweet and indulgent.
The kitchen smelled like a bakery had collided with a candy shop, and honestly, that was exactly the chaos I was aiming for. Red velvet cheesecake balls happened on a rainy Tuesday when I had leftover cake and zero desire to bake anything new. My roommate walked in, saw the mess of crumbs and melted chocolate, and declared it looked like a crime scene. Two hours later, not a single ball survived the night.
I brought a batch of these to a friends potluck last December and watched three people hover protectively near the plate, swatting hands away. One of them admitted she had eaten four before dinner was even served, and she was not embarrassed about it.
Ingredients
- Red velvet cake (300 g): Use leftover cake or grab one from the store, crumble it as fine as you can for the best texture.
- Cream cheese (200 g, softened): Let it sit out until truly soft because cold cream cheese leaves ugly lumps.
- Powdered sugar (40 g): Just enough to sweeten the filling without making it cloying.
- Vanilla extract (1 tsp): A small splash that ties the whole flavor together beautifully.
- White chocolate (250 g): Good quality melts smoother and tastes richer, so skip the cheap baking chips if you can.
- Red food coloring (optional): Tinting the coating gives an extra red velvet look that people love.
- Red velvet crumbs or sprinkles (optional): Save a handful of cake crumbs before mixing for decorating the tops.
Instructions
- Break down the cake:
- Crumble the red velvet cake into a large bowl using your fingers, pressing out any large chunks until everything looks like soft red sand. The finer the crumbs, the smoother your balls will be.
- Whip the filling:
- In a separate bowl, beat the softened cream cheese, powdered sugar, and vanilla together until completely silky with no streaks. A hand mixer makes this faster but a whisk and some elbow grease work just fine.
- Bring it all together:
- Pour the cheesecake mixture over the crumbs and mix with your hands or a spatula until it forms a soft, moldable dough. It should hold its shape when you squeeze a bit between your fingers.
- Roll them out:
- Scoop roughly one tablespoon portions and roll into neat balls, placing each one on a parchment lined tray. Try to keep them uniform so they look polished later.
- Chill thoroughly:
- Refrigerate the tray for at least one full hour so the balls firm up enough to handle without falling apart in the warm chocolate.
- Melt the chocolate:
- Gently melt the white chocolate in a microwave safe bowl in short twenty second bursts, stirring between each, until perfectly smooth. Add a drop or two of red food coloring now if you want that pinkish red coating.
- Dip and coat:
- Drop each chilled ball into the melted chocolate, roll it to cover completely, and lift it out with a fork letting the extra drip away before setting it on parchment. Work quickly because the cold balls will start to set the chocolate on contact.
- Decorate while wet:
- Sprinkle your reserved crumbs or sprinkles over the tops right away before the coating hardens. Once it sets, nothing will stick.
- Let them set:
- Leave the tray at room temperature or pop it back in the fridge briefly until the chocolate shell is completely firm to the touch. Then they are ready to devour.
 Save
Save Somewhere between rolling the twentieth ball and licking chocolate off my wrist, I realized this recipe had become my most requested party contribution. People text me ahead of holidays now asking if the red velvet balls are coming, and that tiny tradition makes me grin every single time.
Keeping Them Fresh
Store these in an airtight container in the refrigerator and they stay perfect for up to five days, though they never last that long in my house. Let them sit out for about ten minutes before serving so the chocolate softens slightly and the filling gets creamy again.
Swapping the Chocolate
White chocolate is classic but dark or semisweet creates a gorgeous contrast against the red interior that looks stunning on a dessert table. Milk chocolate works too if you prefer something sweeter and more kid friendly.
Mixing Things Up
Once you master the basic version, start playing with add ins to make the recipe your own signature treat.
- Stir a tablespoon of crushed pecans into the filling for a subtle crunch that surprises people.
- Roll the finished balls in shredded coconut instead of sprinkles for a completely different texture.
- Always taste the filling before shaping so you can adjust the sweetness to your preference.
 Save
Save These little bites of joy are proof that the best desserts do not need to be complicated, just made with care and shared with people who appreciate something sweet. Roll up your sleeves, embrace the mess, and watch them disappear.
Questions & Answers
- → How long should I chill the balls before dipping?
-
Chill the formed balls in the refrigerator for at least 1 hour until they're firm to the touch. This prevents them from falling apart during the chocolate dipping process.
- → Can I use dark chocolate instead of white chocolate?
-
Absolutely! Dark, semisweet, or milk chocolate all work beautifully. The choice depends on your preference—dark chocolate creates a richer contrast with the sweet red velvet filling.
- → How should I store these dessert balls?
-
Keep them in an airtight container in the refrigerator for up to 5 days. The cool temperature helps maintain the firm texture of both the filling and chocolate coating.
- → Can I freeze these for later?
-
Yes! Place the undipped balls on a baking sheet and freeze until solid, then transfer to a freezer bag. Thaw in the refrigerator before dipping in chocolate.
- → What's the best way to melt the chocolate for coating?
-
Use a double boiler for gentle, even heating, or microwave in 30-second intervals stirring between each. Avoid overheating as chocolate can seize and become grainy.
- → Do I need to make the red velvet cake from scratch?
-
Not at all! Store-bought red velvet cake works perfectly. Just ensure it's fully cooled before crumbling. You can also use leftover red velvet cake from a previous bake.
