 Save
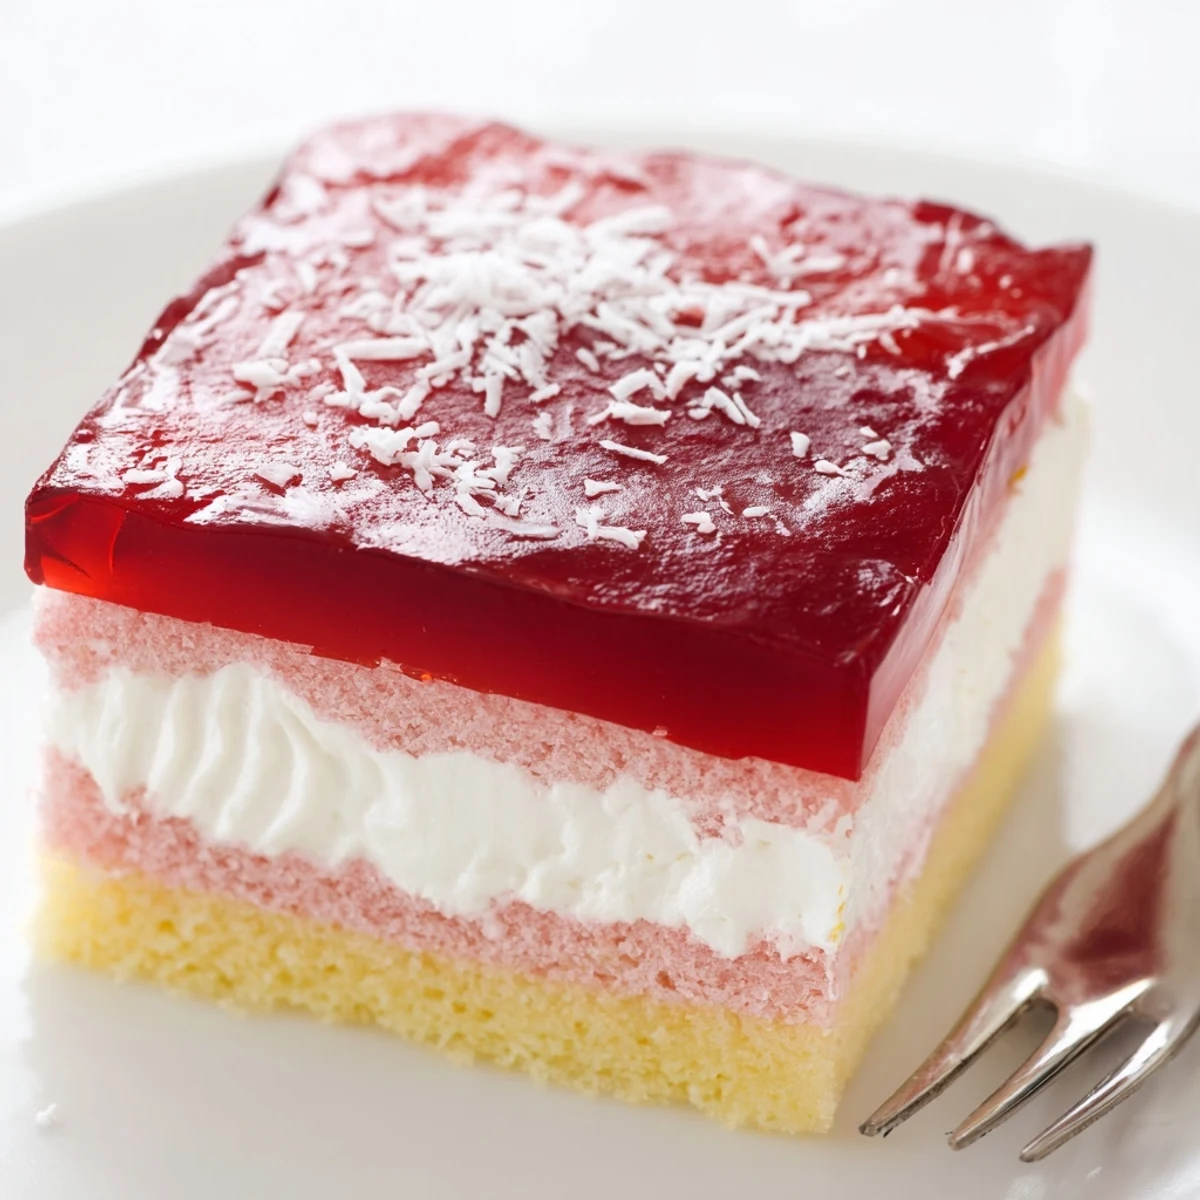
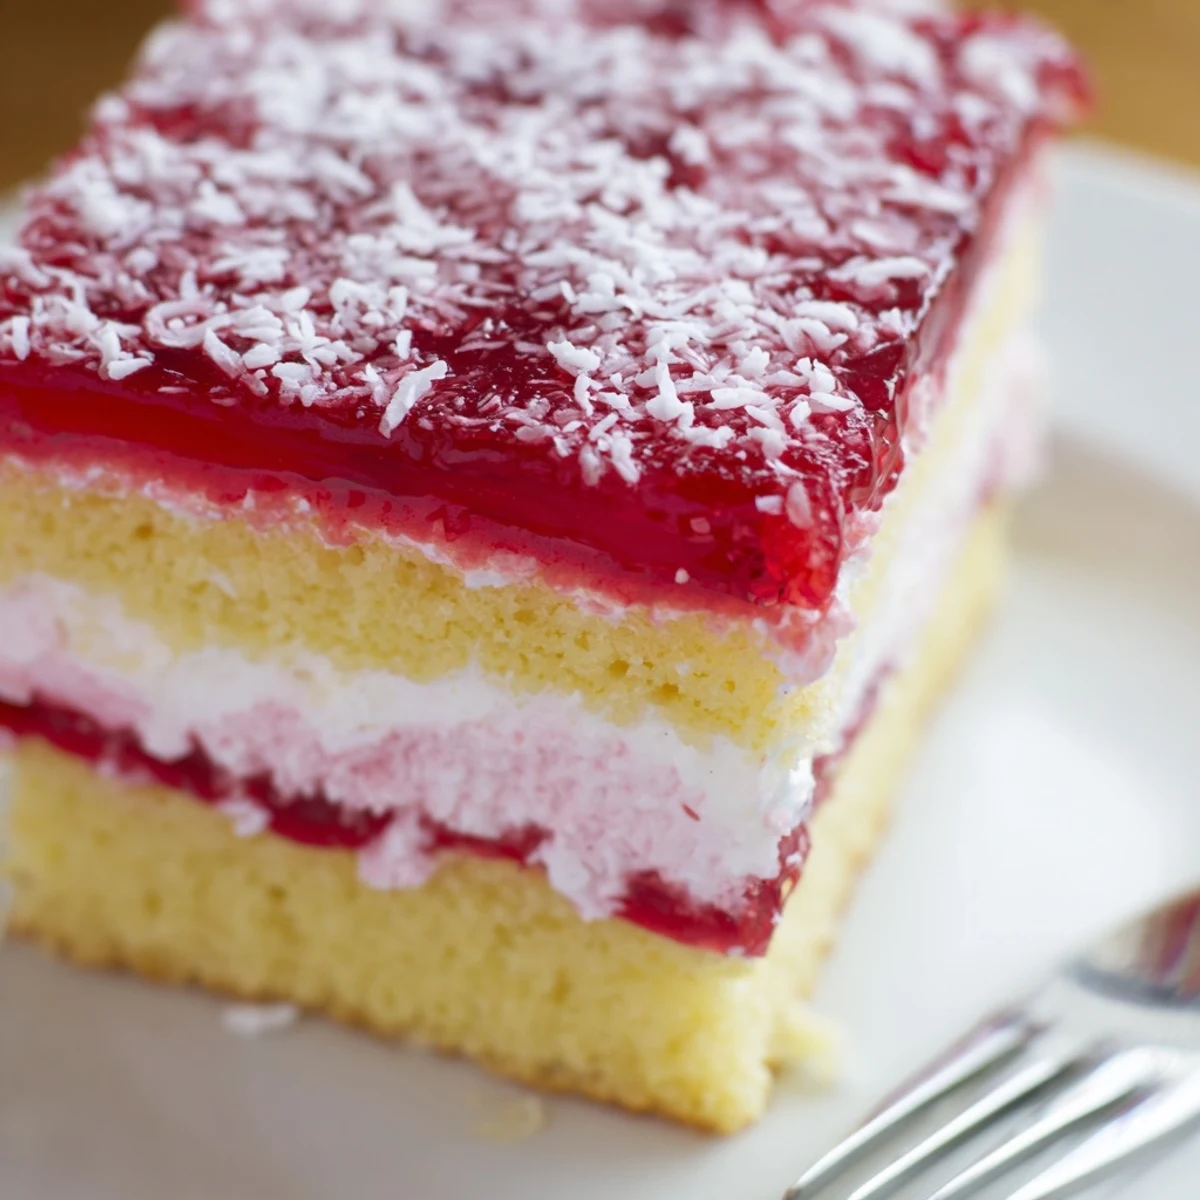
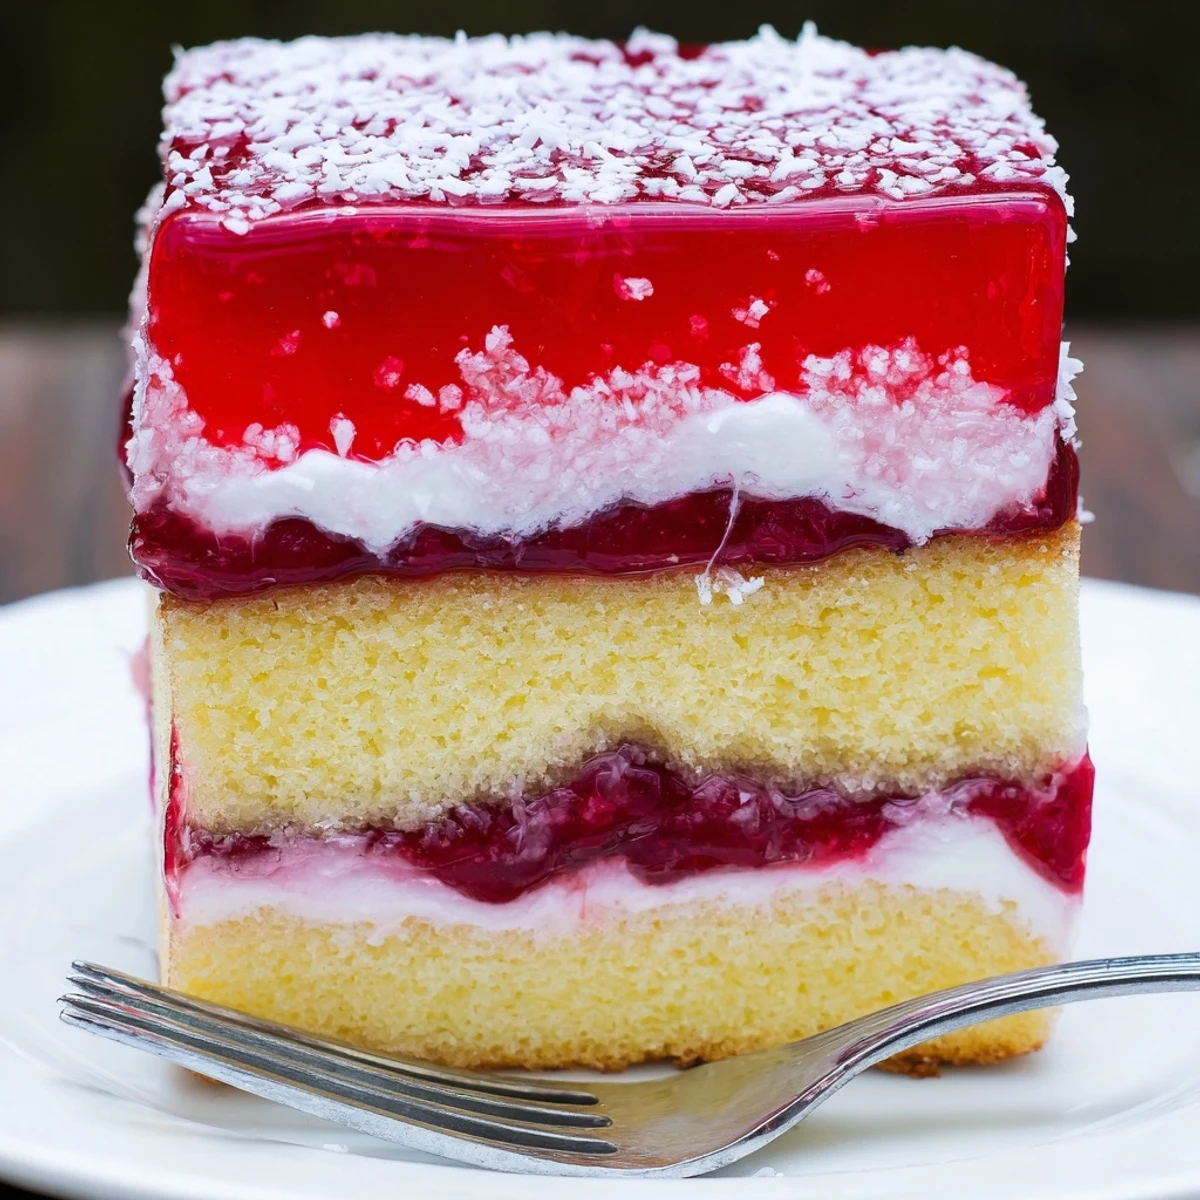
Save Cream butter and sugar until pale, fold in self-raising flour and milk for a light traybake, then bake and cool. Dissolve flavoured jelly in boiling water and chill until just tacky. Whip cream with a touch of icing sugar and vanilla, sandwich sponge squares, dip into the semi-set jelly and roll in desiccated coconut. Chill briefly to set. Variations: passionfruit or orange jelly, or coconut cream for a dairy-free option.
My nan used to keep a tin of these pink jelly cakes on the kitchen counter every time we visited, and my sister and I would demolish half of them before lunch. The coconut always ended up scattered across the floor, stuck to our socks, and somehow in the dog's fur. Thirty years later, the smell of raspberry jelly still transports me straight back to that linoleum kitchen in Brisbane. They are fiddly, messy, and absolutely worth every sticky finger.
A friend once brought a tray of these to a park picnic and three strangers stopped to ask what they were, which turned into an impromptu afternoon tea shared on a blanket with people we had never met before.
Ingredients
- Unsalted butter (125 g, softened): Pull it out of the fridge an hour ahead because cold butter will not cream properly and your sponge will be dense.
- Caster sugar (125 g): The fine crystals dissolve faster than regular sugar, giving you that silky crumb.
- Large eggs (2): Room temperature eggs incorporate more air, which is the whole secret to a light sponge.
- Vanilla extract (1 tsp): Use real extract, not imitation, because the flavor carries through the jelly and coconut layers.
- Self raising flour (180 g, sifted): Sifting is nonnegotiable here, lumps will ruin the delicate texture.
- Milk (100 ml): Whole milk keeps the batter rich and helps everything come together smoothly.
- Raspberry jelly crystals (1 packet, 85 g): Raspberry is traditional but strawberry works just as beautifully for a sweeter finish.
- Boiling water (250 ml) and cold water (150 ml): The temperature balance helps the jelly set at exactly the right speed for dipping.
- Thickened cream (200 ml): Thickened or heavy cream holds its shape inside the cakes without weeping.
- Icing sugar (1 tbsp): Just enough to sweeten the cream without overpowering it.
- Vanilla extract (1/2 tsp for cream): A second hit of vanilla in the filling ties everything together.
- Desiccated coconut (100 g): Toast it lightly if you want extra depth, but raw is perfectly traditional.
Instructions
- Prepare the oven and tin:
- Heat the oven to 180C (350F) and grease then line a 20cm by 30cm baking tin with parchment paper. This step sounds boring but a well lined tin saves you from the heartbreak of a torn sponge later.
- Cream butter and sugar:
- Beat the softened butter and caster sugar with an electric mixer for a good four to five minutes until the mixture looks pale, fluffy, and almost creamy white. Patience here is what separates a flat cake from a cloud.
- Add eggs and vanilla:
- Drop in one egg at a time, beating well after each addition so the batter does not curdle, then pour in the vanilla and mix until fragrant.
- Fold in flour and milk:
- Alternately fold the sifted flour and milk into the batter using a large spoon or spatula, stopping the moment everything is just combined. Overmixing is the enemy of a tender sponge.
- Bake the sponge:
- Spread the batter evenly into the prepared tin and bake for 12 to 15 minutes until the top springs back gently and a skewer inserted in the center comes out clean. Let it cool in the tin for 10 minutes, then gently flip it onto a wire rack to cool completely.
- Make the jelly:
- While the sponge cools, dissolve the jelly crystals in boiling water, stir in the cold water, then pour the mixture into a shallow dish and refrigerate. You want it thick and syrupy but not fully set, usually around 45 to 60 minutes.
- Cut and fill:
- Cut the cooled sponge into 24 even squares using a serrated knife for cleaner edges. Whip the cream with icing sugar and vanilla to firm peaks, then sandwich pairs of sponge squares together with a generous spoonful.
- Dip and coat:
- Working quickly, dip each sandwiched cake into the semi set jelly, coating all sides, and let the excess drip off for a second or two. Roll immediately in desiccated coconut, place on a wire rack, and refrigerate for at least 30 minutes before serving so the jelly sets into a soft shell.
 Save
Save I once made a batch for a school bake sale and they sold out in eleven minutes, which was both thrilling and slightly devastating because I had hidden two in my bag for later and my daughter found them before I did.
Serving Suggestions
Pile them high on a tiered cake stand with a pot of black tea and watch them disappear faster than anything else on the table. They also pair beautifully with a glass of cold milk or a shallow mug of hot chocolate on a winter afternoon.
Variations Worth Trying
Passionfruit jelly crystals give the cakes a sharp tropical twist that is completely addictive and feels a little more modern than the classic raspberry. You can also swap the cream filling for a thin layer of raspberry jam if you want extra fruitiness without the richness.
Storage and Make Ahead Notes
If you must make them ahead, assemble everything except the coconut coating and add that no more than two hours before serving so it stays fluffy rather than damp. The plain sponge squares freeze well for up to a month if wrapped tightly.
- Keep the jelly dipping station cold by placing the shallow dish over a bowl of ice if your kitchen is warm.
- Use two forks to turn the cakes in the jelly so your fingers do not leave dents in the sponge.
- Always test one cake first before dipping the whole batch so you can check the jelly consistency.
 Save
Save These little pink cakes are a labour of love that rewards you with something no shop can replicate, messy hands and all. Make them once and you will understand why they have survived generations of Australian kitchens.
Questions & Answers
- → How long should the jelly chill before dipping?
-
Dissolve the jelly in boiling water, add cold water and refrigerate 45–60 minutes. Aim for a tacky, semi-set gel so it coats without running off; timing varies by fridge and dish depth.
- → How do I keep the sponge from getting soggy?
-
Cool the sponge completely before cutting. Use a thin, firm traybake and allow the jelly to reach a semi-set state; dipping while jelly is still hot or fully liquid soaks the cake.
- → What dairy-free options work well?
-
Substitute whipped coconut cream for the filling and a plant-based spread in the sponge. Ensure the coconut cream is chilled and whipped until firm to hold the sandwich together.
- → Can I change the jelly flavour or filling?
-
Yes. Passionfruit or orange jelly gives a bright tang; you can also use a thick fruit curd or cooled coulis, but textures and setting behaviour will differ—test a small batch first.
- → How far ahead can these be made and stored?
-
These are best made the same day for peak texture, but they keep chilled for 24 hours in an airtight container. Longer storage can soften the sponge and reduce the coconut’s crunch.
- → Any tips for neat squares and even coating?
-
Trim edges and use a sharp knife to cut equal squares. Sandwich gently to avoid compressing the sponge, dip and roll quickly while the jelly is tacky, and transfer to a wire rack to drain excess before chilling.
